|
|
|
|
|
|
|
|
|
Close This Window |
|
|
|
|
INSTALLATION INSTRUCTIONS for REIL ROCK SKIRTING
|
|
|
REIL ROCK PRODUCTS, INC. (RRP) and MOBILE HOME PARTS STORE (MHPS) has provided these suggested instructions as installation guidelines. RRP and/or MHPS; however, neither installs the panels nor has any control over the installation. It is the responsibility of the purchaser and/or installer to ensure panels are installed in accordance with these instructions and any applicable building codes. RRP and/or MHPS assumes no liability for either improper installation or personal injury resulting from improper use or installation.
|
|
|
Measuring Instructions
Measure the height the home is above the ground every 5 feet, add 3 inches and order the needed panels by heights. The panels finish 57" in length. If 24" or less in height is needed, order the 48" panel and cut in half.
|
|
|
Tools and Accessories Needed (Not Included)
1. Utility razor knife
2. Power saw with fine tooth blade (reverse blade)
3. Electric screwdriver or drill with 1/4" hex head driver bit
4. Tape measure
5. Straight edge and/or carpenters square
6. Hammer
7. Trenching spade (for using bottom trench method) |
8. Rake/hoe for dirt replacement and backfill
9. Chalk line and marking pencil
10. 1" hex head screws installed every 12"L for attaching panels to home
11. Matching color 1" hex head screws for joining panels and installing vent inserts
12. Vent inserts and access door conversion kit |
|
|
|
|
|
|
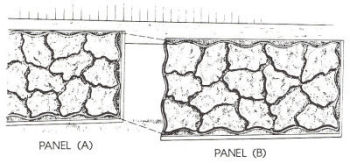
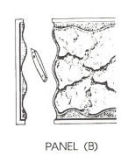
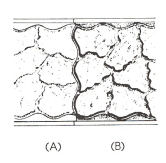
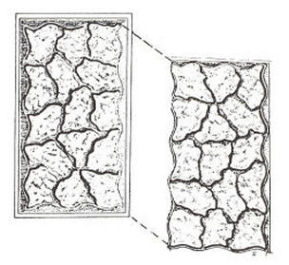
| Panels can be installed running left or right, up or down. To make a seamless appearance, leave the flange on panel (A); with a utility knife, cut along curved lines on panel (B) and let it lap over panel (A). Screws should be placed in mortar joints to hold panels together. |
|
|
|
|
|
|
|
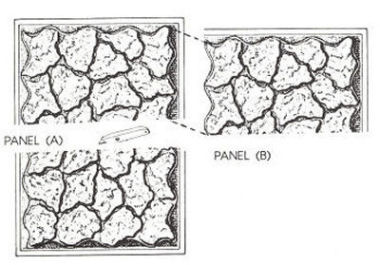
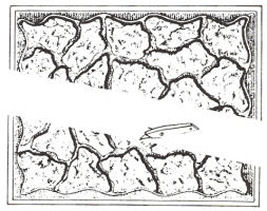
| Illustration shows cutting a 48" x 60" panel in half vertically to make two 30" x 48" panels. May also be cut horizontally to make two 24" x 60" panels. |
|
| On all panels above 36", we recommend a backing or frame to prevent blowout. |
|
|
|
|
|
|
|
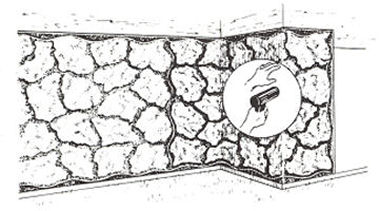
| Inside and outside corners can be made by heating panels with a heavy duty heat gun and bending panels around corner. |
|
| In areas where mobile home is not level, panels should be cut at the bottom. We recommend striking a line with a chalk line, then cutting the panel along the line. |
|
|
|
|
|
|
|
|
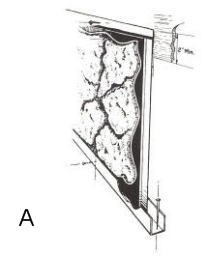
Figure A:
Typical installation leaving top flange on, screwing through flange, skirting must be a minimum of 2" above the bottom of the trim, as shown in illustration. Also shown using bottom rail. |
|
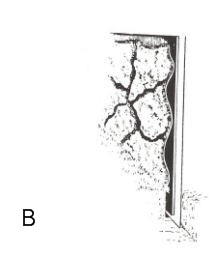
Figure B:
Not using bottom rail, burying the panel a minimum of 3" in the ground. |
|
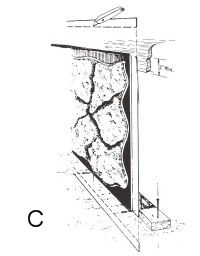
Figure C:
Typical installation cutting off top flange. Skirting must be a minimum of 2" above the trim, as shown in illustration. Screw with painted screws through the panels at mortar joints to hold panels securely. |
|
|
|
| Alternate Installation Method: Leaving top lip on and placing top lip behind the siding trim. Slide top lip of panel behind the outside trim board of home and secure with screws. You may wish to remove trim board entirely, attach panels to home and replace trim board over top lip of panels. |
| Note: The application of the top of the panel is interchangeable with the application of the bottom of the panel. When attaching panels to bottom track or top trim, screws should be installed a minimum of 12" apart. |
| Ventilation - Since Reil Rock Skirting is nearly airtight and will not self-ventilate, vent inserts are needed and are available. Ventilation codes may vary by community and manufacturer. Check with the proper authorities in your area to determine amount of ventilation required. |
| Access - Access can be gained at virtually any point by using a color matched Reil Rock access door. |
|
|
|
Close This Window |
|
|
|
|
|
