 As a new RVer, there is a lot to learn about your new RV to get on the road. Understanding how your RV’s water system works and how to obtain water is vital for your travels. You will use your water system for drinking, cooking, showers, and even using the toilet. While the best way is always be doing it, it certainly helps to do a little research before diving in headfirst. In this article, we will discuss the basics of your RV water system, including:
- How Do RV Water Systems Work?
-
- RV Water Pump
- RV Holding Tanks
- How to Use a City Water Supply
- How to Connect to City Water Supply
- Turn Off Your Water Pump
- How to fill Your RV’s Fresh Water Tank?
-
- Fresh Water Hose
- Locate the Intake Valve
- Locate the Water Level Indicator
- Fill Up Your Tank
How Do RV Water Systems Work?
Your RV’s water system comprises several moving pieces and parts to keep your water fresh and clean. Two of your RV’s significant components are the water pump and your holding tanks.
RV Water Pump
Every RV water system is equipped with an essential 12-volt on-demand water pump. This pump allows your RV to remain self-sufficient even when you are not connected to a city water supply or shower power by running off a battery. The 12-volt on-demand water pump will pull water directly from your RV’s freshwater tank for us even when you are the go by simply turning on the water pumps switch.
When your water pump is turned on, it will pressurize the entire water system until it reaches the factory shut-off to regulate the water pressure. Therefore, when you turn on a water faucet, your water pressure will naturally decrease from the maintained factory pressure. This will switch the pump back on and repressurize your water system.
Your water pump is only a tiny piece of your RV’s overall water system. However, it plays a large part, allowing water to continuously flow throughout your RV plumbing. With a basic understanding of how your water pump functions, we can discuss some easy preventive maintenance steps to keep it pumping.
RV water pump maintenance is very straightforward. By keeping your water system sanitized and periodically performing inspections and cleaning the strainer, you should have no difficulties prolonging the life of your water pump and your water system as a whole.
RV Holding Tanks
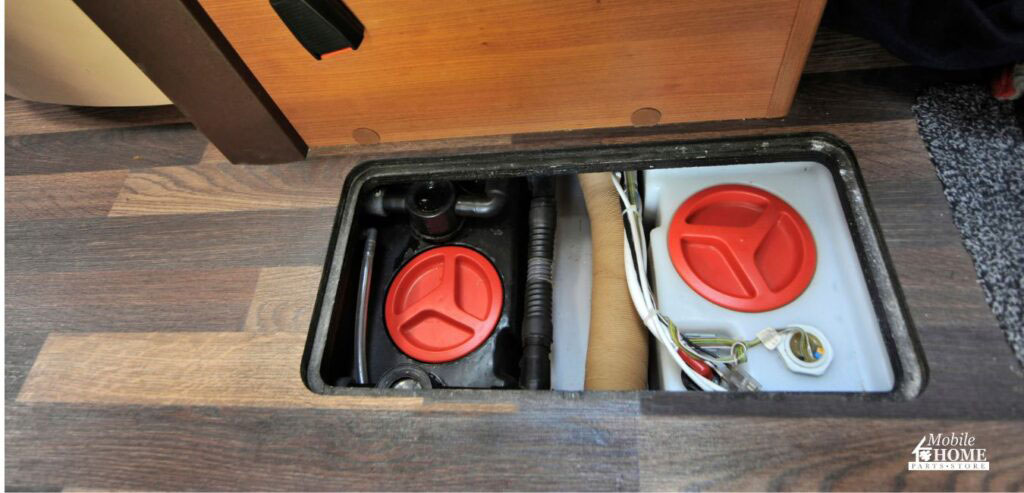
An RV’s water system revolves around three separate holding tanks, fresh, black, and gray water. Your freshwater tank holds fresh, clean water that is pumped throughout your RV’s faucets, shower, and toilet. If your tank is spotless and the water source is from a trustworthy vendor, you can even drink from it.
However, your gray and black water tanks are considered your wastewater. Gray water is wastewater that is drained from the kitchen and bathroom sinks, as well as your shower. In other words, it typically contains soap, dirt, and maybe some grease from last night’s dinner. Blackwater, on the other hand, lives up to its name. In short, your black water tank contains anything you flush down the toilet. These three tanks are maintained through ports outside your rig for accessible filling, draining, and cleaning purposes.
In addition to these three tanks, you will always have a hot water heater. The hot water heater typically stores 6 to 10 gallons of water to be used when hot water is needed. Pretty basic so far, right?
For additional information, reference your water systems schematic and manual (usually provided by the manufacturer through their website or on purchase) to alleviate any further questions.
How to Use a City Water Supply
There is no need to worry about your RV’s freshwater tank if you are at a campsite with a water hook-up. You can simply use the city water supply rather than draining your freshwater tank. Most RVs come with water intake valves with either two separate connections or one.
How to Connect to City Water Supply
If you have two separate connections, one valve will be used to fill up your tank while the other is used connecting with your city supply. To connect correctly, you will need to know which valve allows for connecting with your local or city supply. If the valve is not labeled on your RV, we suggest referencing your RV’s manual.
However, suppose your RV only has one valve to connect. In that case, the valve will allow you to simply switch between filling the tank or using the city supply. You will want to change the valve to the city supply or local supply option. If your switch is not labeled, it is best to always consult your RV manual or manufacturer for guidance.
Turn Off Your Water Pump
Once your hose is connected to the correct water intake valve or switch, you will want to turn off your water pump. The water pump is only necessary when using water from your freshwater tank. In other words, since you are hooking up a hose to your RV at the campsite or park, you are bypassing your freshwater tank altogether.
The city or local spigot pressure will push the water through the hose and throughout your rig when you use a faucet or flush. It’s important to remember each park or campsite will have a different water pressure varying from high to low. Therefore, it is essential to use a pressure regulator when connected to a water source to prevent any leaks damage to your RV’s water system from the pressure. For more information on pressure regulators, check out our Keep Your RV’s Water System in Peak Performance blog.
How to fill Your RV’s Fresh Water Tank?
Your RV’s freshwater tank can come in handy when a city or local water supply is unavailable at your campsite. However, a freshwater tank does not do you much good if it doesn’t have any water. To fill your tank, you will need your grab your freshwater hose, locate your freshwater tank water intake valve, and find a spigot for a water source.
Fresh Water Hose
First, we would like to stress having two separate hoses, one for your septic and one for your freshwater. Your freshwater hose should be white or blue. These hoses must be kept separate from one another to avoid any contamination to your drinking water.
Locate the Intake Valve
As stated before, RVs will either have one or two water intake valves. You will want to connect one end of your freshwater hose to the valve or switch for the freshwater tank. The opposite end of the hose should be attached to the spigot of your water source.
Locate the Water Level Indicator
Before you open the spigot, locate your tank’s water level indicator inside your RV. It is crucial to remember that visually seeing how full your tank is will always be more accurate than an indicator. Try to get a visual reading on your tank if you can beforehand. If you can, use the tank indicator on the panel to tell you when the water tank is approaching full if you cannot see the water level in your tank.
Fill Up Your Tank
Next, turn on the hose from the course and fill up your tank. Based on how big your tank is and if the next RV park has city or local water, you may want to think twice about filling your tank completely. Water weighs on average 8lbs per gallon. Therefore, if you have a pretty big freshwater tank, this could add extra weight to your traveling load.
Lastly, when your tank reaches full or to your desired amount of water, be sure to leave enough time to go outside to turn off the spigot. You never want to overfill your tank since this could cause issues for the tank and you’re plumbing.
If you have one water intake valve, you will want the valve to remain on the fill tank. Unhook your hose and store it away in its designated spot, away from your septic hose.
Closing
Well, you have conquered the basics of your RV’s water system without floating away. With a basic understanding of how your water system works and how to obtain water, you are much closer to hitting the road. We hope this guide has been helpful and you enjoy your first RV trip. Happy travels, and as always, if you find you need any RV supplies, Mobile Home Parts Store always has the parts and supplies you need!
Tags: RV, rv parts store, RV Water System


