


Alright, the decision’s made—you’re putting in a skylight. Not just dreaming, not just bookmarking ideas. You’ve got the motivation, maybe even the skylight itself, and now it’s time to figure out how this thing actually comes together. Because let’s be honest—this isn’t like swapping out a faucet or painting a bedroom. You’re cutting into the roof. That alone makes it feel like a big deal.
But big doesn’t mean impossible. If you’ve got a little DIY experience, a steady hand, and some patience, you can absolutely pull this off. This guide will walk you through everything—measuring, cutting, sealing, finishing—so you know exactly what to expect before you start.
Before You Begin: Planning and Safety First
Start by choosing where the skylight will go. Kitchens and bathrooms benefit from the added ventilation, while hallways or living rooms can gain a new sense of openness. You’ll also need to consider your roof type—metal or shingle—since installation steps differ slightly.
Before cutting anything, inspect what’s above the ceiling. Use a small test hole to check for electrical wiring or ducts. This will save you time and keep things safe. If you’re clear, you’re ready to move forward.
Tools and Materials You’ll Need
Before you get too far ahead, now’s a good time to take stock—because the tools you need will depend on what kind of roof you’re working with.
For Metal Roofs
- Pencil, square, utility knife, tape measure
- Tin snips, hammer, screwdriver, hand saw
- Butyl caulk, sheet metal screws (#8×1/2), 10d common nails
- 2x4s or 2x2s for framing
- Plywood backer board (3/8″ or 1/2″ thick)
- Insulation (minimum R-11)
- Drywall or ceiling tiles for the interior tunnel
- Trim or mouldings
For Shingle Roofs
- Tape measure, knife, hammer, hand saw
- Drill with 1/8″ bit, screwdriver
- Roofing nails, 10d nails, 3/8″ head screws
- 2x4s or 2x6s for framing
- Flashing, butyl caulk, or tape
- Vapor barrier for the tunnel
Measure Twice—Layout from Below and Above
You’ve got your tools, your plan—now take a deep breath, and grab your pencil.
Ceiling Side (all roofs)
- Aim between rafters so you’re not re‑engineering the roof load.
- With a square and pencil, sketch the rough opening to match the skylight’s tunnel size.
- Take a breath and re‑measure every side—fractional mistakes on the ceiling echo loudly on the roof.
Transferring the Outline to a Metal Roof
- From inside, push an awl or ice pick straight up through each corner.
- On the roof, connect those dimples with a chalk line; that’s your cut.
Transferring the Outline to a Shingle Roof
- Drive a nail through each inside corner instead. Nails show up cleaner through decking and shingles.
- Snap chalk lines to complete the rectangle.
Cutting and Prepping the Opening
Metal Roofs
- If the sheet is thin enough, score three sides and hinge it back like a lid. Thicker panels call for tin snips along your chalk lines.
- Drop in the plywood backer board underneath the metal and nail it to the rafters. This backing lets your screws bite something solid and keeps the skylight tight for the long haul.
Shingle Roofs
- Slice shingles inside the outline, then cut the roof sheathing flush to the line.
- If you sever a rafter, install double headers on both sides of the opening so the load stays balanced. Fasten headers with 10d nails or structural screws.
Framing the Light Shaft ( a.k.a. Tunnel)
From the ceiling to the roof, frame out a vertical tunnel with your 2x4s or 2x6s. You can angle the shaft if you want to direct more light into a specific area. Make sure all edges of the interior finish material are well-supported.
Insulation & Vapor Barrier
Use fiberglass insulation with a minimum R-11 rating. Don’t forget to add a vapor barrier before closing up the tunnel. This helps prevent condensation and keeps things energy efficient.
Skylight Prep and Placement
Keep the skylight’s protective film on until everything is installed. Apply butyl caulk beneath the flange—this forms your first water barrier.
Skylight: Pre‑set Prep
- Leave the factory film on the dome until the last sweep of cleanup.
- Run a healthy bead of butyl caulk on the underside of the skylight flange—this is your first water stop.
Metal Roofs
- Lower the skylight into the opening from above.
- Start fastening in the middle of each side, working to the corners so the caulk compresses evenly.
- Don’t crank the screws tight enough to distort the frame; snug is perfect.
- Dab butyl over every screw head and any exposed seams where metal meets flange.
Shingle Roofs
- Set the skylight with its vent side facing downslope.
- Use the pre‑punched holes to drive ⅜‑in. head screws through the flange and into the framing.
- Apply two beads of caulk: one where the dome meets the flange, another along any anti‑siphon rib specified by your skylight’s manual.
- Flashing matters—slide step‑flash pieces under each shingle course, then finish with a continuous head flashing at the top.
Finishing the Interior
- Cover the inside walls with drywall, beadboard, or matching ceiling tile.
- Tape, mud, and sand joints just as you would on any ceiling patch.
- Prime and paint or stain to match the room below.
- Clean the skylight glaze with mild soap and a soft cloth—no abrasive pads.
Common Pitfalls and How to Avoid Them
- Don’t overtighten screws. This can warp the skylight frame and weaken your seal.
- Never skip the backer board on a metal roof—it’s essential for long-term support.
- Use a vapor barrier. Forgetting this step could lead to moisture issues.
- Line up your openings carefully. A misaligned tunnel can cause leaks or require patching.
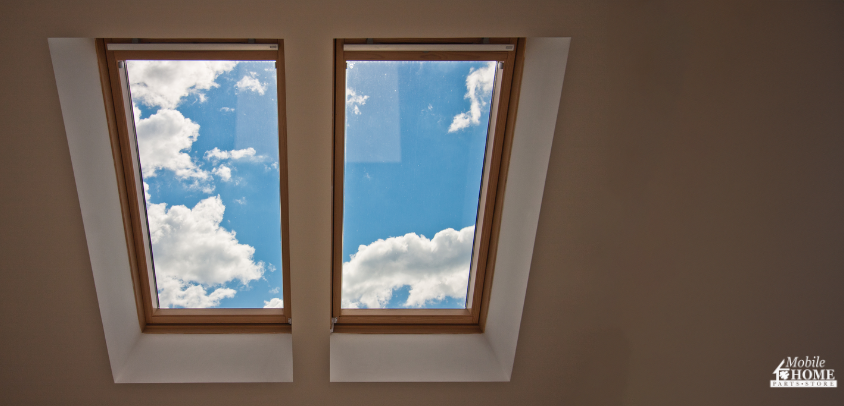
The Light at the End of the Tunnel (Literally)
Yes, you’ll sweat a little. You’ll measure, re‑measure, and maybe mutter at a stubborn tin‑snip cut. But when that first shaft of natural light hits the floorboards, the effort proves its worth. A skylight lifts the mood, trims electric bills on sunny days, and plain makes a space feel special.
Take your time, trust your tape measure, and remember: every pro once made their first roof cut, too. If you need the right fasteners, flashing, or a skylight built for manufactured homes, Mobile Home Parts Store keeps them in stock and ready to ship—so your new view of the sky doesn’t have to wait.
Tags: mobile home skylights, skylight, skylights

