


Quick Overview
Crawl space ventilation helps protect the area under your home from moisture buildup that can lead to damp insulation, wood rot, musty odors, and soft floors. This article explains how much ventilation is usually needed, how to calculate vent area, how skirting affects airflow, and what signs may point to a problem under the home.
Summarize full blog with:
Moisture is stubborn. Give it a dark, still space under your home, and it will settle in like it pays rent. It clings to insulation, hangs around on wood framing, and turns the air under the floor damp and stale. After a while, that moisture does not always stay under the home either. You may start noticing it in the form of a musty smell, soft flooring, or signs that something underneath just is not drying out the way it should.
When that starts happening, airflow is usually part of the conversation. Crawl space ventilation helps move damp air out from under the home before it can build up and linger. Once skirting closes in that space, the ventilation underneath needs to be enough to keep moisture from settling in and overstaying its welcome.
Why Crawl Space Ventilation Is Important
The main job of under-floor ventilation is moisture control.
Some of that moisture rises from the ground, while some comes in with humid outdoor air. It can also come from small plumbing leaks, condensation, or vapor moving down from the living space above. None of that is unusual by itself. Problems start when that damp air gets trapped under the home and cannot dry out.
When damp air stays trapped under the home, the materials around it start feeling the effects. Insulation can hold moisture and lose effectiveness. A belly wrap can sag. Wood framing can stay damp longer than it should. Metal parts can start to rust or corrode. Over time, the floor above may start to feel soft, uneven, or a little spongy in spots.
That kind of damage usually does not show up overnight. It builds slowly, which is part of what makes it easy to miss at first. By the time you notice a smell, a soft spot, or signs of moisture under the home, the problem has often been there for a while.
Ventilation helps break that cycle by letting air move through the space and carry moisture out before it has time to settle into everything underneath your floor.
General Crawl Space Ventilation Requirements
A common rule for crawl spaces is 1 square foot of ventilation opening for every 150 square feet of under-floor area.
If you prefer easier math, there is a handy shortcut. Since 1 square foot equals 144 square inches, many people round that and use 1 square inch of vent opening for each square foot of floor area. It is close enough for rough calculations and much easier to work with.
The total amount of vent area is only part of it, though. Where those vents are placed also counts. Air needs to move across the space, not just enter through one side and stall out. That is why vents should be spread around the perimeter instead of grouped together in one area.
Corners need attention, too. If there is no airflow near the corners, damp air can sit there longer than it should. So when you are checking venting under a home, do not just count openings. Look at where they are and whether air can actually move through the full space.
How to Calculate Crawl Space Ventilation Needs
Start by measuring the area under the home.
If your home is 16 feet wide and 76 feet long, the math looks like this:
16 × 76 = 1,216 square feet
Then divide that number by 150:
1,216 ÷ 150 = about 8.1 square feet of ventilation opening
If you want to use the square-inch shortcut instead, it works like this:
1,216 square feet = about 1,216 square inches of vent area
That total can be split up across several vents around the skirting or perimeter enclosure. You do not need one large opening. What you need is enough total vent area, placed in a way that allows air to move through the whole space.
One detail trips people up all the time. The outside size of a vent is not the same as the actual airflow opening. Screens, louvers, and decorative covers all cut down the amount of open space. A vent can look big from the front and still not provide as much airflow as you think.
So if you are replacing vents or planning new skirting, check the net free vent area, not just the overall size of the vent cover.
How Skirting Affects Crawl Space Ventilation
Skirting helps in a lot of ways. It gives the home a more finished look, reduces wind beneath the floor, and helps protect pipes, insulation, and other components underneath.
But once skirting encloses the space, you cannot count on air moving through naturally, the way it would in an open setup. That is where crawl space ventilation becomes more deliberate.
If the skirting has built-in vents, those vents need to provide enough airflow for the size of the home. They also need to be spaced around the perimeter so air can move through the enclosed area instead of getting trapped in one section.
If the skirting is solid, separate vent openings may need to be installed.
This also comes up when older skirting gets replaced. A home may have had enough venting before, but after repairs or upgrades, some of those openings get covered or removed. That can reduce airflow under the home without it being obvious right away.
Vent placement should also work year-round. In colder areas, vents should not sit so low that snow can block them for long periods. In any climate, they should stay clear of soil, mulch, leaves, and plants.
Common Problems That Reduce Crawl Space Ventilation
A home can start out with decent ventilation and still run into trouble later. Usually, that happens because the vent area gets reduced over time.
Here are some of the most common problems.
Blocked Crawl Space Vents
Leaves, grass, cobwebs, dirt, and insect nests can clog vents more than most people expect. From a distance, the vent may look fine. Up close, it may be half blocked.
Soil or Mulch Covering Crawl Space Vents
Over time, landscaping can slowly creep up around the skirting. Soil or mulch can cover the lower part of a vent and reduce the amount of air getting through.
Skirting Repairs That Reduce Vent Area
A damaged panel gets replaced with a solid one. An older vented section gets covered during an update. What looks like a simple repair can end up cutting down airflow under the home.
Poor Crawl Space Vent Placement
You can have enough vent area on paper and still have damp sections underneath. If vents are clustered in one spot or missing near corners, airflow may not reach the whole space.
Seasonal Blockage Around Crawl Space Vents
Snow, stacked materials, or temporary coverings can block vents for weeks at a time. If that happens during damp weather, moisture can build up fast.
Keeping vents open and clear is one of the simplest ways to support crawl space ventilation and avoid moisture problems before they turn into repairs.
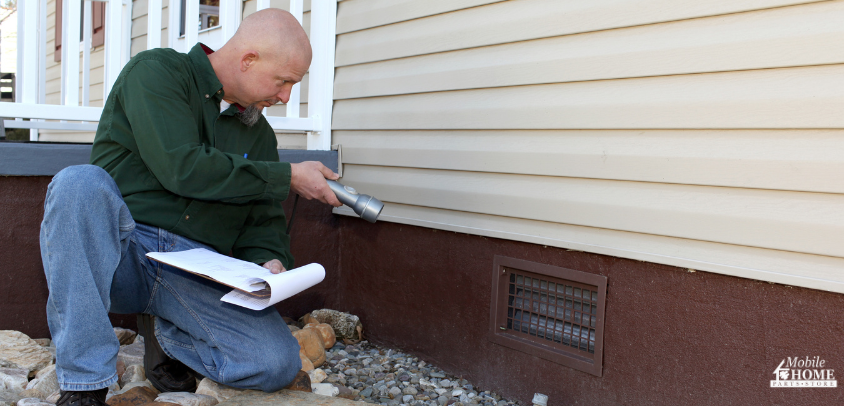
Signs Crawl Space Ventilation Is Not Working Properly
You do not always need to crawl under the home to tell that something is off.
A musty smell indoors is one clue. Soft spots in the floor are another. If you can see part of the underside, look for sagging insulation, loose belly material, damp wood, mold, rust, or condensation on pipes.
Those are all signs that moisture may be hanging around too long.
If wood under the home stays damp for long stretches, it can start to decay. Joists and other framing members can weaken over time. By then, what started as a ventilation issue may turn into a much larger repair.
That is why it helps to pay attention to small changes. The earlier you catch a moisture problem under the home, the easier it usually is to fix. Checking under the home from time to time, especially after heavy rain, skirting repairs, or a season change, can help you catch blocked vents, standing water, or damp insulation before the repair gets bigger.
Other Ways to Manage Moisture Under a Home
Open vents are the setup most people are familiar with, but they are not the only way moisture gets handled under a home.
Some homes have a ground vapor barrier laid over the soil to help keep moisture from rising up into the space. Others may use mechanical ventilation or a more controlled setup that brings in conditioned air. Those approaches can work, but they need to be installed the right way and sized for the space they are serving.
If your home already has standard vent openings, start by looking at what is there. Make sure the vents have not been blocked, buried, or removed over time. In a lot of cases, the issue is not that the home needs a whole different system. It is that the original ventilation is no longer doing the job because airflow has been cut down.
Protecting Your Home With Proper Crawl Space Ventilation
Moisture under the home rarely stays just under the home. Once it starts building up, it can affect insulation, framing, flooring, and the overall condition of the home above it.
That is why it helps to keep the basics in check. Make sure the crawl space has enough vent area for its size. Spread those openings around the perimeter. Keep them clear so air can keep moving through the space.
If you are replacing skirting, adding vents, or dealing with moisture under the home, Mobile Home Parts Store has the parts you need to handle the repair properly. From skirting panels to crawl space vents and other products that support crawl space ventilation, we are here to help you protect your home from the ground up.
Tags: manufactured home, mobile home, mobile home crawl space, mobile home ventilation, Skirting Vents, underbelly

