


Quick Overview
Elastomeric roof coating is a liquid-applied, flexible membrane that helps protect a roof from sun, moisture, and surface wear. On mobile homes, it is commonly used to seal minor cracks, reflect heat, and extend the life of a roof that is still structurally sound.
Summarize full blog with:
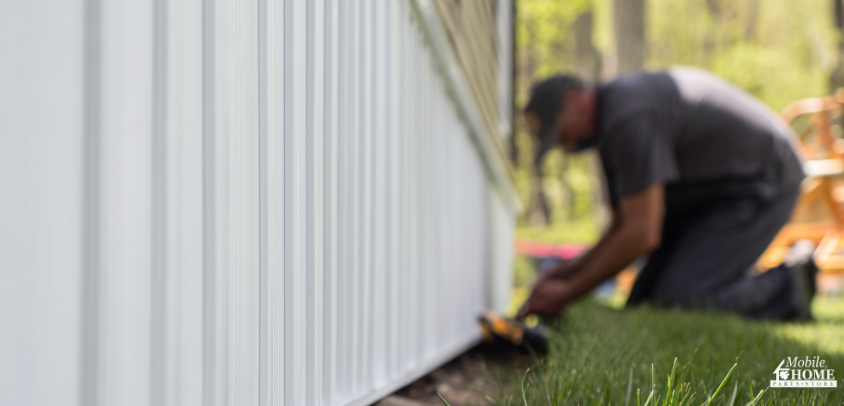
When your trailer skirting starts looking dull, streaked, or muddy along the bottom edge, the whole home can look a little more worn than it is. Pollen, grass clippings, splash-back from rain, mildew, and plain old grime all collect there over time, especially on lighter panels or textured finishes. In most cases, cleaning it is not a hard job. A garden hose, mild soap, a soft brush, and a little patience will handle most of it. The main thing is cleaning it without being hard on the panels or pushing water where it shouldn’t go.
A careful cleaning does more than freshen up the outside of your home. It also gives you a clearer look at what shape the skirting is in. Once the dirt is off, it’s much easier to spot cracked panels, loose trim, blocked vents, or gaps near the ground that were easy to miss before.
Why Cleaning Trailer Skirting Actually Matters
It’s easy to treat skirting like a finish detail, but it does more work than that. Your mobile home skirting helps close off the space under the home, keeps out debris and pests, and supports a healthier area beneath the home when everything is intact and venting the way it should. When the surface is covered in dirt, algae, or mildew, it gets harder to tell whether the skirting is just dirty or starting to wear out in places.
Mold and mildew are one reason to pay attention, but it’s not the only one. It usually shows up where things stay damp longer than they should. That matters because ongoing moisture around or under the home can lead to bigger maintenance problems than a stained panel. Cleaning gives you a chance to look past the buildup and catch small issues early, before they turn into something more involved.
What You Need to Clean Vinyl Skirting
This is one of those jobs where basic tools usually do the best work. You don’t need a stack of specialty products, and in most cases a gentler setup is the better choice for vinyl skirting.
Here’s what you’ll want nearby:
- A garden hose with a spray nozzle
- A bucket of warm water
- Mild dish soap or an exterior cleaner labeled safe for vinyl
- A soft-bristle brush, wash brush, or large sponge
- Microfiber cloths or soft rags
- Gloves
- A step stool if needed for taller sections
That’s enough for routine cleaning on most homes. If you’re dealing with mildew spots or heavier residue, a vinegar-and-water mix or a vinyl-safe cleaner can help with spot treatment. The goal is simple: loosen the dirt and lift it off without scratching the surface or pushing water behind the panels.
What to Avoid When Cleaning Trailer Skirting
This is where people tend to run into problems.
A pressure washer might sound like the easy answer, but around seams, vents, and lighter panels, it can create more trouble than it solves. Too much pressure can crack panels, loosen seams, strip finishes, or force water behind the skirting. For most trailer skirting, a garden hose is the safer choice.
It’s also best to skip:
- Abrasive scrub pads
- Wire brushes
- Solvent-based cleaners
- Bleach-heavy mixes
- Scraping tools that can gouge the finish
- Strong upward spray aimed into seams or vents
If a cleaner feels like it might be rough on siding or trim, it’s probably too much for your skirting too.
Step 1: Clear Around the Skirting
Start with a walk around the full perimeter.
Move anything leaning against the skirting or sitting close to it. That might be planters, hoses, stacked materials, toys, tools, or yard décor. It’s simple, but it makes everything else easier. It also gives you a clean look at the full surface before it gets wet.
Take a minute to look at the vents, corners, trim, and lower edges while you’re there. If something already looks loose or cracked, make a mental note so you know where to take it easy once you start scrubbing.
Step 2: Rinse Off Loose Dirt First
Before you grab a brush, rinse it down.
Use the hose to wash off loose dust, cobwebs, pollen, and surface dirt. Work from top to bottom so gravity helps carry everything down and away. This step saves more time than it seems. If you skip it, you’re just dragging grit across the surface when you start scrubbing.
Pay extra attention to the bottom edge. That’s where most of the buildup tends to sit.
Step 3: Mix a Safe Cleaning Solution
Fill a bucket with warm water and add a small amount of mild dish soap. You don’t need much. Just enough to help break up grime.
If you’d rather use a store-bought cleaner, choose one labeled safe for exterior vinyl surfaces. That works well for mobile home skirting as long as it’s not overly harsh. For mildew spots, a light vinegar-and-water mix can help. It’s still worth testing any cleaner in a less visible area first, especially on textured or colored panels.
Step 4: Scrub in Small Sections
Work in smaller sections instead of trying to do the whole side at once. Four to six feet at a time usually works well.
Dip your brush or sponge into the solution and scrub with light to medium pressure. You’re trying to lift dirt, not force it off. Spend a little more time around vents, corners, trim, and the lower edge where mud and splash-back collect.
If your trailer skirting has texture, work the brush into those grooves. That’s where dirt tends to settle. Going section by section keeps the soap from drying before you rinse it.
Step 5: Rinse Each Section Right Away
After scrubbing a section, rinse it right away.
Work from top to bottom again and make sure all the soap is gone. Leftover cleaner can leave streaks or a film that attracts more dirt. Then move on and repeat the same process.
It’s not exciting work, but it’s steady and it works. For most trailer skirting, this approach gets the best results without being hard on the material.
How to Remove Mildew and Tough Stains
Most of the time, soap and water will take care of it. Some spots just need a little extra attention.
Mildew shows up in damp, shaded areas. Hard water can leave light streaks. Mud near the bottom edge may need a second pass, especially after a wet stretch. Start with the mildest option. Apply your cleaner, let it sit briefly, then scrub gently and rinse.
This is where patience helps. Going slower is usually better than jumping to stronger chemicals or more pressure. Vinyl skirting tends to clean up well if you give the buildup time to loosen.
Dry and Check for Damage
Once everything is rinsed, let it air dry. If you want to speed things up, wipe it down with a microfiber cloth.
Then take one more walk around the home.
This is when things stand out. Look for:
- Cracks or splits in panels
- Loose sections or trim pieces
- Warping or bowing
- Missing fasteners
- Bent or blocked vents
- Gaps near the ground
- Fading that may mean the material is getting close to replacement time
It’s also worth checking the ground beneath the skirting. If it’s uneven, washed out, or packed with debris, that can affect how the panels sit and leave openings underneath.
How to Prevent Moisture Around Skirting
If mildew or staining keeps coming back, it’s worth paying attention to how water moves around the home. In a lot of cases, the skirting isn’t the source of the problem. It’s just where the moisture keeps showing up. Watch where roof runoff lands, make sure gutters are clear, and check that downspouts are carrying water away from the home instead of letting it collect right next to the skirting. After a hard rain, look for low spots where water tends to sit, and take note of sprinklers or hoses that may be keeping one side damp.
It also helps to keep the area around the skirting from staying packed in with mulch, leaves, or heavy plant growth. That kind of buildup holds moisture against the panels and makes it harder to spot trouble early. If the same area keeps staying wet, it may be time to look at a bigger fix, like improving the grade, adding downspout extensions, or installing an exterior drainage solution such as a French drain.
How Often to Clean Trailer Skirting
Most people end up doing this in spring and fall. Spring clears off everything winter left behind, and fall helps before colder weather sets in.
If your home sits near gravel, under heavy trees, or in an area where the lower panels get splashed often, you may end up cleaning more often than that. Staying ahead of buildup is usually easier than dealing with it once it’s set in.
When to Replace Trailer Skirting
Cleaning helps when the problem is dirt, mildew, or surface buildup. It does not fix skirting that has started to fail.
If your panels are cracked, brittle, warped, pulling out of place, or leaving gaps near the ground, more scrubbing is not going to change that. At that point, the issue is not that the skirting looks dirty. It is that it is no longer closing off the space under the home the way it should. The same goes for loose sections, damaged vent areas, or panels that keep shifting after weather changes. Those are signs it may be time to repair or replace sections instead of putting more effort into cleaning.
What Clean Skirting Can Tell You
A good cleaning can freshen things up, but it also tells you what’s going on around the base of your home. Sometimes it really is just dirt and runoff. Sometimes a wash makes it easier to spot loose panels, moisture trouble, or sections that are starting to wear out.
If your trailer skirting still looks solid once it’s clean, you’re probably in good shape with routine upkeep. If the cleaning shows cracks, shifting panels, damaged vents, or areas that are past saving, it may be time to replace the parts that are no longer doing their job. Mobile Home Parts Store carries mobile home skirting, vinyl skirting, vents, trim, and other skirting parts to help you handle repairs or plan a full replacement with the right materials.
Tags: deluxe vinyl skirting, mobile home skirting, mobile home skirting panel, Skirting, spring cleaning

