


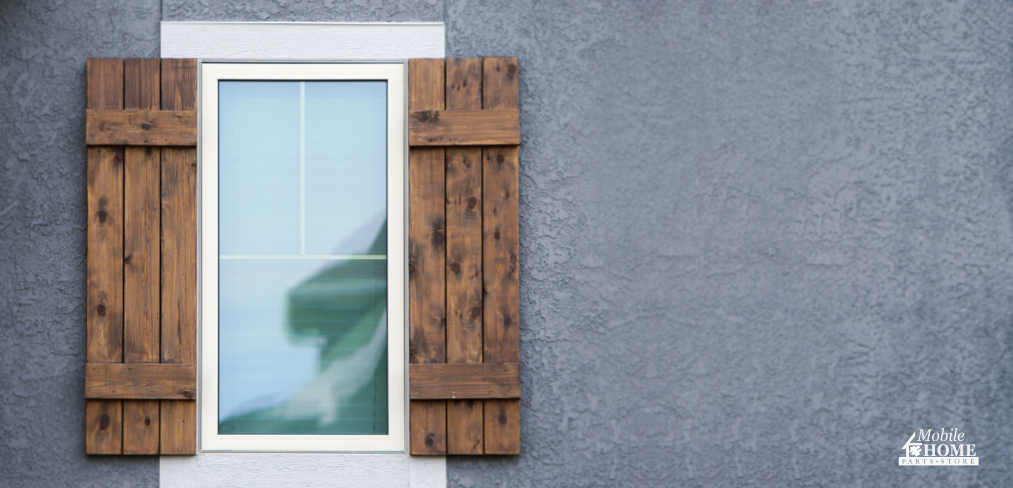
 Installing exterior shutters on your mobile home is a fantastic way to enhance its curb appeal and add a personal touch to your exterior decor. Whether you want to make your home look nicer or protect it from the weather, adding shutters is a simple project you can do yourself. Depending on how many windows you have, you could finish the job in just one afternoon. All you need are the right tools and some basic DIY skills.
In this guide, we’ll walk you through everything you need to know about measuring and installing exterior shutters for your mobile home. Let’s get started!
How to Measure Exterior Shutters
Once you’ve picked out your mobile home shutters, it’s time to take some measurements. You can’t choose custom vinyl exterior shutters if you don’t know what size to order!
- Measure the Window Height: Start by measuring from the window’s top edge to the bottom. Make sure to measure in a few different spots and use the smallest measurement to ensure a good fit. Don’t include the window frame in this measurement.
- Measure the Window Width: Next, measure from the left edge of the window to the right edge. Again, take multiple measurements and use the smallest one.
Choosing the Right Width
When choosing your shutters, aim for widths that are close to half the width of your window. In the past, functional shutters were designed to cover the entire window without overlapping when closed. If your shutters are too narrow or wide, they might look out of place. Even if your shutters aren’t functional, it’s nice to follow this tradition. Shutters that are about half the width of your window tend best!
Matching Shutter Width and Height
Use the chart above to match your window width to the appropriate shutter width. Then, choose a shutter length (height) that matches the height of your window, excluding the outside frame.
With your shutter style, color, and measurements ready, you’re all set to place your order!
How to Install Exterior Shutters
Now that you have your shutters and measurements, it’s time to get them installed. Don’t worry—it’s not too hard! With the right tools and a bit of patience, you can do it yourself.
Shutters from Mobile Home Parts Store come with detailed installation instructions to guide you through each step. These instructions are your go-to source for accurate installation. But, to give you a head start, here’s a general overview of the process. This way, you’ll know what to expect when you open up your new shutters.
1. Position Shutters
If needed, start by removing the old shutters.
- For Shutters with Fasteners: Use snips or a hacksaw blade to cut the spike holding the shutter in place. Insert the tool between the wall and the shutter to cut.
- For Shutters with Screws: Simply unscrew them from the wall.
Now, hold the new shutter against the window on the house’s exterior. If you’ve ordered the right size, the shutter should fit perfectly between the top and bottom window frames.
- Make sure the shutter is aligned between the upper and lower frames and that it’s flush with the vertical window frame.
- Use a level to ensure it’s straight.
- Mark the positions of the shutter’s mounting holes on the wall with a pencil. Measure 2 inches from the top and bottom. You’ll need a hole near each corner and two more holes midway along the length of the side rails.
2. Drill Mounting Holes
Remove the shutter and drill holes at the marked positions.
To make drilling easier, lay the shutter face-up on a flat surface, like a piece of plywood on two sawhorses. Ensure the holes are deep enough for the screws or fasteners you’ll be using.
Use a drill to pre-drill holes at each mark on the shutter.
3. Drill Pilot Holes for Shutter Hardware
Reposition the shutter on the exterior wall and look at the holes in your shutter. Use a punch or another marker to mark where you’ll drill the mounting holes on your wall.
Remove the shutter and drill through the siding and into the wall. Drill at least 1¾ inches deep at each mark. The type of wall material will determine the drill bit size. Also, whether you’re using mounting screws or shutter spikes will affect the size of the bit and how deep you drill.
To help keep track of how deep you’re drilling, measure and wrap tape around the drill bit.
4. Install Shutters
If you’ve drilled your holes correctly, installing the shutters should be a breeze.
Using Metal Screws with Painted Heads:
- Reposition the shutter on the wall.
- Start by placing a screw in one corner using the holes in the shutter as a guide. Use a hand screwdriver, not a drill, to tighten the screw just until it’s snug. Be careful not to over-tighten, as this can warp your shutter.
- Align the opposite corner of the shutter with its hole and install that screw next. Then, continue adding screws diagonally around the shutter, much like you would when mounting a tire on a car.
Using Shutter Spikes:
- Push the shutter spikes through the pilot holes in the shutter and into the wall.
- Gently tap the spikes with a hammer to snug the shutter to the siding. Use a small hammer if you have one to avoid damaging the vinyl spikes or the shutter.
- Be careful not to over-tighten, as this can cause warping or dimples on the surface of the vinyl shutters.
- Repeat the process for any remaining shutters.
For more information about installing mobile home exterior shutters, check out these videos DIY How to Install Exterior Shutters with Spikes and DIY How to Install Exterior Shutters with Screws.
Exterior Shutter Maintenance
Now that your mobile home shutters are installed, the only thing left is maintenance. You’re in luck—vinyl shutters require very little upkeep to keep them looking their best. Here are some maintenance tips:
- Cleaning: Regularly clean your shutters using a solution of 4 parts water to 1 part strong dish detergent. Use a bristle brush or mop to remove dirt, pollen, and other debris that can build up over time.
- Inspect for Damage: Periodically inspect your shutters for any signs of damage, such as cracks or fading. Vinyl shutters are durable, but it’s always good to check for wear and tear.
- Repaint or Replace: If your shutters are painted and you notice the paint is chipping or fading, consider repainting them to restore their appearance. If they are severely damaged, it might be time to replace them.
- Secure Fasteners: Check the fasteners to ensure they remain secure. Over time, screws can loosen, so it’s a good idea to tighten them if needed.
Mobile Home Parts Store Custom Vinyl Shutters
Installing exterior shutters on your mobile home is a straightforward project that can dramatically enhance its appearance. With the right tools and a bit of effort, you can complete this DIY project in no time.
Ready to give your mobile home a facelift with beautiful exterior shutters? Shop at Mobile Home Parts Store today and give your mobile home the perfect finishing touch with beautiful custom shutters.
Tags: exterior shutters, mobile home, Mobile Home Exterior Shutters, mobile home shutters, Vinyl Exterior Shutters, Vinyl Shutters

