Is your mobile home toilet giving you trouble? Maybe it’s leaking, outdated, or just not working like it used to. Replacing a toilet might sound like a big job, but with the right tools and a bit of patience, you can do it yourself! This guide will walk you through the process of removing your old mobile home toilet and installing a new one. Let’s get started!
Why Replace Your Mobile Home Toilet?
If your toilet has been acting up, it might be time for a change! Leaks and constant running aren’t just annoying – they can lead to some serious issues. A leaky toilet, even a small one, can soak into the subfloor over time, causing rot, mold, and some pretty unpleasant (and expensive) surprises. Plus, all that wasted water can really add up on your bill! Replacing an old toilet now can help you avoid costly repairs down the road, save on water, and give you peace of mind. So, if you’re noticing any signs of trouble, it might be worth looking into a new, efficient toilet!
What You’ll Need:
- Adjustable wrench
- Screwdriver
- Sponge or towels
- New wax gasket
- Putty
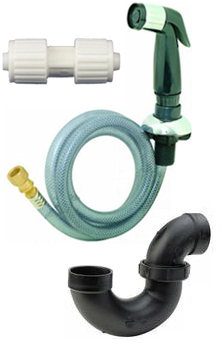
- Flexible water supply line
- New mobile home toilet
- Rust-proof washers (if needed)
Removing the Old Toilet
Step 1: Empty the Water
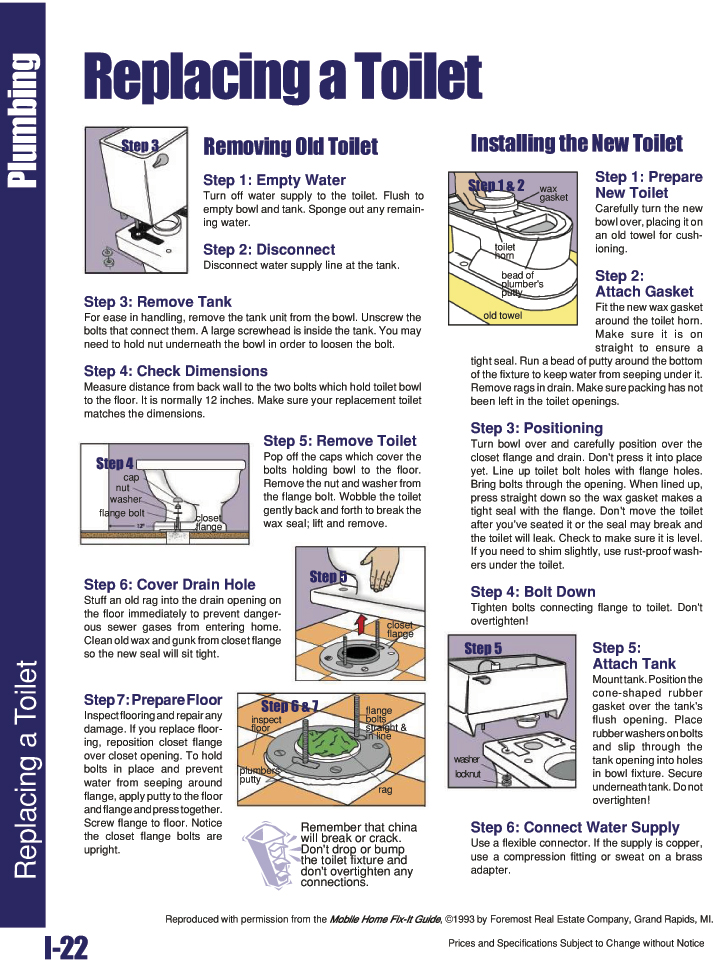
First things first, turn off the water supply to your toilet. You’ll usually find a valve on the wall behind the toilet. Turn it clockwise until it stops. Then, flush the toilet to empty the bowl and tank. There might be a little water left, so use a sponge or towels to soak it up. This step ensures you won’t have a watery mess when you remove the toilet.
Step 2: Disconnect the Water Supply Line
Next, you’ll need to disconnect the water supply line from the tank. Use an adjustable wrench to loosen the nut connecting the line to the bottom of the tank. Once it’s loose, you can unscrew it by hand. Be ready with a towel in case a small amount of water drips out.
Step 3: Remove the Tank
For easier handling, it’s best to remove the tank from the bowl. Inside the tank, you’ll see two or three large bolts holding it to the bowl. Use a screwdriver to unscrew them. You might need to hold the nut underneath the bowl to keep it from spinning. Carefully lift the tank off and set it aside on a towel.
Step 4: Check the Dimensions
Before you go any further, measure the distance from the back wall to the two bolts that hold the toilet bowl to the floor. In most cases, this distance is 12 inches, but it’s important to make sure. This measurement is called the “rough-in” distance. Your new mobile home toilet should match this dimension to fit properly.
Step 5: Remove the Toilet Bowl
Now, pop off the caps covering the bolts at the base of the toilet. Remove the nuts and washers from the bolts. The toilet might be stuck to the floor because of the wax seal. Gently rock the toilet back and forth to break the seal. Once it’s loose, lift the bowl and move it out of the way.
Step 6: Cover the Drain Hole
Immediately stuff an old rag into the drain opening on the floor. This prevents sewer gases from coming into your home, which can be smelly and even dangerous. Also, take this time to clean off any old wax or gunk from the closet flange (the ring that connects the toilet to the floor). A clean surface ensures a tight seal for your new mobile home toilet.
Step 7: Prepare the Floor
Inspect the flooring around the drain. If there’s any damage, now’s the time to fix it. If you’re replacing the flooring, reposition the closet flange over the drain opening. Apply some putty around the bottom of the flange to prevent water from seeping underneath. Secure the flange to the floor with screws. Make sure the flange bolts are upright and ready for the new toilet.
Installing the New Toilet
Step 1: Prepare the New Toilet
Lay an old towel on the floor and carefully place your new mobile home toilet bowl upside down on it. This protects both the toilet and your floor.
Step 2: Attach the Wax Gasket
Fit the new wax gasket around the toilet’s horn (the outlet at the bottom of the bowl). Make sure it’s straight and firmly in place. A proper seal here is crucial to prevent leaks. Run a bead of putty around the base of the toilet to keep water from seeping underneath. Don’t forget to remove the rag from the drain opening!
Step 3: Position the Toilet
Carefully turn the toilet right-side up and position it over the closet flange and drain. Align the bolt holes on the base of the toilet with the bolts on the flange. Once everything is lined up, press straight down to compress the wax gasket and create a tight seal. Avoid moving or rocking the toilet after this point, as it could break the seal. Use a level to check if the toilet is even. If it’s wobbly, place rust-proof washers or shims under the base until it’s stable.
Step 4: Bolt Down the Toilet
Place washers and nuts on the flange bolts and tighten them by hand. Then, use a wrench to snug them up, but be careful not to overtighten. Tightening too much can crack the porcelain. Once secure, replace the bolt caps.
Step 5: Attach the Tank
Position the rubber gasket (usually cone-shaped) over the flush opening on the bottom of the tank. Insert the tank bolts with rubber washers through the holes in the tank. Carefully lower the tank onto the bowl, aligning the bolts with the holes. Underneath the bowl, secure the nuts onto the bolts. Tighten them evenly, alternating sides, but don’t overtighten. The tank should be snug and level.
Step 6: Connect the Water Supply
Attach a new flexible water supply line to the fill valve on the bottom of the tank. Connect the other end to the water supply valve on the wall. If your supply line is copper, you might need a compression fitting or a brass adapter. Tighten the connections securely, but again, don’t overtighten.
Finishing Up
Turn the water supply back on slowly. As the tank fills, check for any leaks around the base, the tank bolts, and the water supply connections. Flush the toilet a few times to ensure everything is working properly. Congratulations, you’ve successfully installed your new mobile home toilet!
Tips and Reminders
- Safety First: Always be cautious when lifting heavy objects like a toilet. If it’s too heavy, ask for help.
- Double-Check Seals: Leaks can cause damage over time, so make sure all seals are tight.
- Dispose Properly: Check with your local waste management about disposing of your old mobile home toilet.
A Flawless Flush with Mobile Home Parts Store
Replacing a mobile home toilet doesn’t have to be overwhelming, especially when you have the right tools and supplies. Whether you’re upgrading to a new toilet or making essential repairs, Mobile Home Parts Store has you covered with everything you need to get the job done right. We offer the Fluidmaster Complete Toilet Repair Kit for quick, comprehensive fixes, along with replacement parts like the Rubber Toilet Flapper and ProPlus®Toilet Seat Bolts to help complete the job with ease. With reliable products from Mobile Home Parts Store, you’ll have the peace of mind knowing your mobile home toilet replacement is built to last.
From start to finish, having quality supplies can make all the difference in your DIY experience.
Updated on November 15, 2024: This article has been refreshed with the latest insights, tips, and product recommendations to ensure it provides the most accurate and helpful information for our readers.
Tags: mobile home, mobile home toilet, toilet


