Have you ever been standing in the shower, staring at that old, worn-out shower head, thinking, There has to be a better way to start my day? Or maybe you’re dealing with weak water pressure or a slow drip that’s driving you up the wall. Replacing your mobile home’s shower head is easier than you might think, and it’s one of those simple upgrades that can make a big difference in your daily routine.
In this guide, we’ll walk you through the process step by step so you can confidently tackle this DIY project. Whether you’re dealing with leaks, looking to enhance water flow, or simply upgrading your bathroom’s style, we’ve got you covered.
Picking the Perfect Shower Head
Upgrading your shower head isn’t just about looks (though that’s definitely a bonus!). A new shower head can improve water pressure, help conserve water, and make your shower routine more enjoyable. It’s also a great way to give your bathroom a quick refresh without spending a fortune. But choosing the right shower head is key to ensuring your new setup works well and suits your style. Here’s what to consider:
- Water Pressure: If you’ve struggled with low pressure, look for a shower head designed to optimize flow. Many modern models offer adjustable settings for a customized experience.
- Style and Finish: Match your new shower head to your existing faucets or opt for a contrasting look to create a statement. Chrome and brushed nickel are both timeless options.
- Additional Features: Want a handheld option? Multiple spray settings? Think about how you use your shower and pick a head that fits your needs.
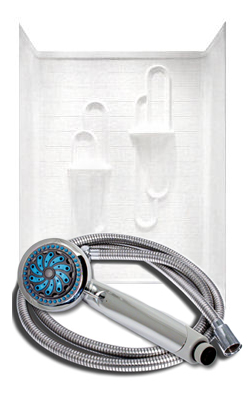
When you’re ready to shop, head over to the Mobile Home Parts Store. Our options, like the Empire® Ultra series and Phoenix®, are specifically designed for mobile homes, so you don’t have to worry about compatibility issues.
How to Change a Shower Head
Before we get going, here’s one important note: You’ll need access to the back of the wall to replace your shower arm. Most mobile homes have an access panel in a closet or another room behind the shower, so double-check that you can get to it.
Gather Your Tools and Materials
Let’s make sure you’ve got everything you need so there aren’t any mid-project panic moments. Here’s your checklist:
- Allen wrench (5/16 or 7/32)
- Channel locks
- Crescent wrench
- Flathead screwdriver
- Phillips head screwdriver
- Pipe joint compound
- Soft cloth
- Teflon tape
- Your new shower head (and maybe a playlist for some motivational tunes)
Having everything ready before you start is half the battle. Trust me, it’ll save you a ton of frustration.
Remove the Old Shower Head
Alright, it’s time to say goodbye to that old shower head:
- Access the Plumbing: Open the access panel behind the shower to reach the shower arm’s connections. This is where the magic happens (and by magic, I mean plumbing).
- Unscrew the Nut: Use a crescent wrench to loosen the nut that secures the shower arm to the water supply. It might take a little effort, but it should come loose with a few turns.
- Remove the Metal Crimp Washer: Pull out the washer that holds the shower arm in place.
- Remove the Shower Arm: From the tub side (inside your shower), carefully pull out the entire assembly. Be gentle—you don’t want to damage the surrounding area.
- Detach the Shower Head: Unscrew the old shower head from the arm. If it’s stuck, use channel locks to loosen it, but wrap it in a soft cloth first to protect the finish.
Clean the Threads on the Shower Arm
Now that the old shower head is off, take a moment to clean the threads on the shower arm. Wipe away any old Teflon tape, pipe joint compound, or gunk. A clean surface makes all the difference when it’s time to attach the new one.
Seal the Shower Connection
Next, let’s prep the shower arm for the new head:
- Wrap the threads with Teflon tape (two or three wraps should do the trick). This helps create a tight, leak-proof seal.
- You can use pipe joint compound instead, but Teflon tape is often easier to work with.
Install the New Shower Head
- Reattach the Shower Arm: Insert the shower arm back through the wall opening and secure it from the back. Replace the crimp washer and tighten the nut with your crescent wrench.
- Attach the Shower Head: Screw the new shower head onto the arm by hand. If it’s a bit loose, give it a gentle turn with your channel locks, but use a soft cloth to avoid scratching the finish.
- Inspect Your Work: Step back and admire your progress. You’re almost done!
Check for Leaks
Turn on the water and watch for leaks. If you see water dripping where it shouldn’t, don’t panic:
- Tighten any loose connections.
- Remove the shower head and reapply Teflon tape or pipe joint compound if the leak persists. Then, reattach and test again.
Leaks are a common hiccup, but they’re usually easy to fix with a bit of adjustment.
How to Fix Leaks
If you’re experiencing leaks after installing your new shower head, don’t worry—most leaks are easy to fix.
- Leak at the Shower Head Connection: Remove the shower head and check the Teflon tape. If it appears damaged or insufficient, apply new Teflon tape to the shower arm threads and reattach the shower head.
- Leak Behind the Wall: Ensure the tight nut connecting the shower arm to the water supply. If necessary, use the crescent wrench to tighten it gently. Be cautious not to overtighten, as this could damage the plumbing.
- Persistent Leaks: If leaks continue after these steps, inspect the shower arm and shower head for any cracks or damage. Replacing faulty parts may be necessary.
Conclusion
That’s it—you’re done! Installing a new shower head in your mobile home is a rewarding DIY project that can elevate your bathroom in just a few steps. Whether you’ve upgraded to a sleek chrome design or a brushed nickel finish, you’ve improved your shower experience and added a touch of style to your space.
If you need more supplies or inspiration for future projects, Mobile Home Parts Store is here to help with a range of options designed specifically for mobile homes. Take a look, and see how you can make your next project just as simple and rewarding. ere’s to more refreshing and relaxing showers ahead. Well done!
Tags: how to, mobile home bathtub faucet, mobile home shower, shower head


