


If you’re like most people, your RV spends the fall and winter in hibernation. We eagerly anticipate getting our rig ready for camping as the temperatures rise. But one of the most crucial components of your RV is the refrigerator. Most RVs have an absorption fridge that runs on either LP gas or 120-volt electricity with no moving parts. While some larger units now use residential refrigerators with a compressor. However, for this article, we will focus on the first one, the absorption refrigerator, and what you should do to prepare it for the camping season.
1. Clean and Inspect the Refrigerator Vent
The refrigerator vent is crucial for keeping your fridge running efficiently. If it gets blocked with dirt, dust, or debris, the airflow will be restricted, causing the fridge to overheat.
- Locate the Vent: Find the vent on your RV. If your fridge isn’t in a slide room, the vent usually has an open cavity to let hot air escape to the roof. On the roof, you’ll see a vent with a plastic cover.
- Remove the Cover: Carefully take off the vent cover using a screwdriver. Make sure to keep the screws in a safe place so you don’t lose them.
- Clean the Vent: Inside, you’ll see a rectangular “flue” or box with a screen to keep rodents out while allowing hot air to escape. Use a soft brush or vacuum cleaner to remove debris, dust, or spider webs.
- Inspect for Damage: Check the vent for any signs of damage or wear. If you see any cracks or breaks, you might need to replace the vent cover.
2. Cleaning the Burner Assembly
Next, let’s take a closer look at the burner assembly. This part is crucial for your RV refrigerator, especially if it runs on propane. Bugs love the smell of propane gas, so the burner assembly can quickly get dirty with dust and spider webs.
Clean the Burner:
- Clean the burner assembly and the flue that runs up the right side. Use an air compressor to blow out soot and any obstructions. Attach an air blower and a ¼” hose for better cleaning.
- Make sure to wear safety glasses, as this can get messy!
Clean the Cooling Unit:
- Stick the blower up the back of the cavity to blow off all the dust from the cooling unit. Dust on the cooling unit creates more heat, making it less efficient.
3. Reinstall the Water Filter to the Ice Maker
If you have an ice maker, you should have removed the filter, turned off the water, and drained the ice maker when you winterized it last year. If you didn’t, that’s a discussion for another day. For now, follow these steps:
- Install the Water Filter: If you removed the water filter during the off-season, it’s time to install a new one. Follow the manufacturer’s instructions to install it correctly.
- Turn on the Water: Check the water supply to ensure everything is connected correctly. This step is crucial if you’ve adjusted your RV’s plumbing recently.
- Check the Line: After turning on the water, you may need to run it through a few times to remove any air and ensure a steady flow. Inspect the connections for leaks and tighten them if necessary.
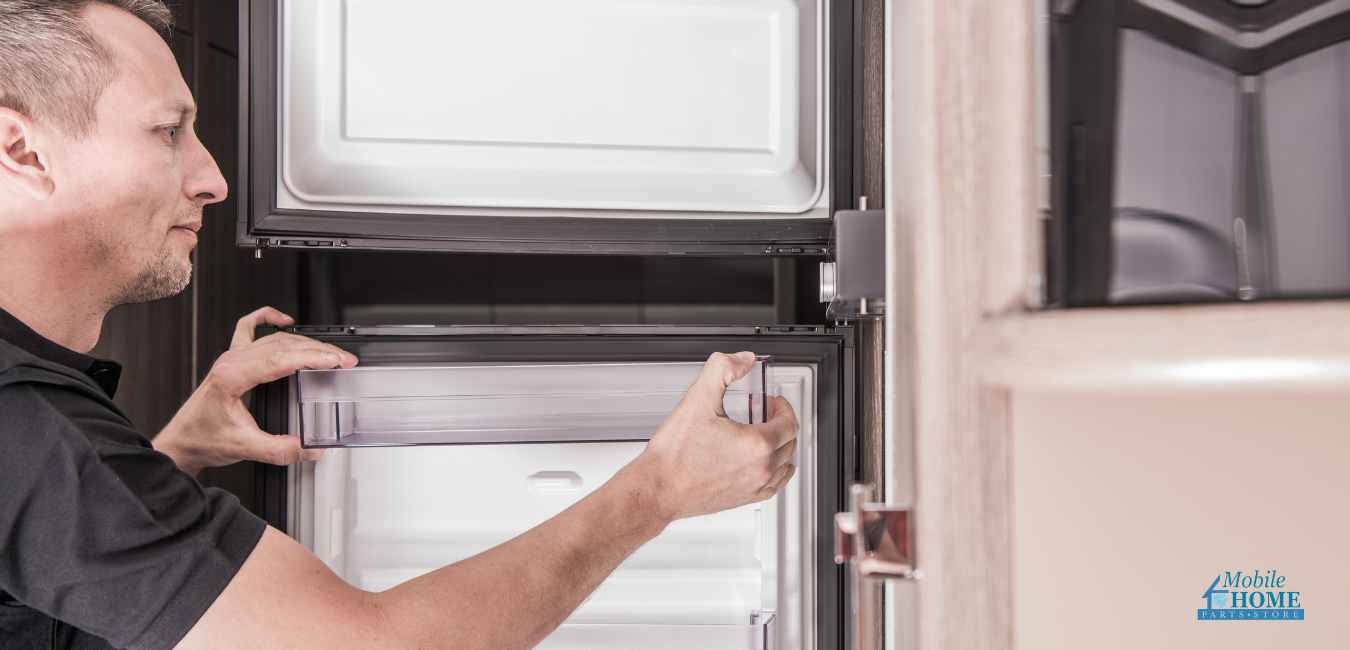
4. Check the Refrigerator Door for a Tight Seal
A tight seal on the refrigerator door is everything! It keeps the inside at the right temperature and stops the cooling system from overworking. If the door gasket doesn’t seal well, warm, humid air can sneak in. This can make your fridge not cool properly and cause condensation and frost.
Putting heavy items like milk or large water bottles on the door shelves can weigh down the door. This can make the door sag, causing the gasket not to seal correctly.
Check the seal by doing a simple test:
- Open the door a little and place a piece of paper between the door and the fridge frame.
- Close the door and gently tug on the bill.
- If the paper slides out easily, the seal isn’t tight enough. A good seal should have a slight resistance when you pull the paper.
- Repeat this test on all four sides of the door.
5. Clean The Inside and Check The Thermistor
Now that the outside is sorted, let’s turn our attention to the inside.
Clean Surfaces
Mold and mildew can sometimes grow inside a refrigerator when it’s not in use. It’s a good idea to wipe down everything inside using a mild cleaner like dish soap and water. Afterward, rinse with a mixture of baking soda and water, then dry thoroughly.
Inspect the Thermistor
The thermistor is a temperature sensor usually clipped to the coils inside the refrigerator. Adjusting its position can raise or lower the temperature, as warmer air tends to rise inside the fridge. Check for any rust or condensation around the thermistor during your visual inspection. If you spot any issues, replacing it before your next trip might be wise.
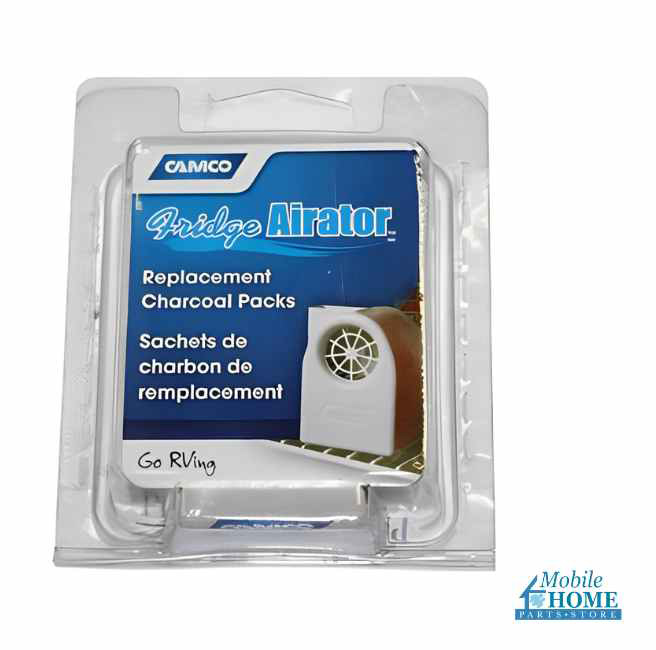 6. Replace Charcoal Pack
To keep your RV refrigerator smelling fresh, consider replacing the charcoal pack. A product like Camco’s Replacement Charcoal Pack is designed specifically for this purpose.
- Remove the Old Pack: If you have an old charcoal pack, take it out and dispose of it.
- Install the New Pack: Follow the instructions provided with the new charcoal pack to ensure it’s installed correctly. This will help absorb any odors and keep your fridge smelling fresh!
Get Your RV Fridge Ready for Adventure
Getting your RV refrigerator ready for the camping season doesn’t have to be a daunting task. By following these steps, you can ensure your RV refrigerator is clean, efficient, and ready for the camping season. Regular maintenance not only extends the life of your refrigerator but also enhances your overall camping experience. Enjoy your adventures with the peace of mind that your food and drinks are kept fresh and cool, just as they should be.
So, pack up, hit the road, and enjoy the great outdoors with your trusty RV! Happy RVing!
Tags: Camco Fridge Airator, RV, RV fridge, RV life, RV refrigerator

