


 It’s about that time of the year where mother nature teases us with on-again, off-again spring-like weather, and with that comes the itch to get our rigs ready for the RV camping season. With any luck last fall, you made sure to drain the water system or add antifreeze, remove your house batteries, and batten down the hatches. Now it’s time to wake up your RV from hibernation and get ready to hit the road with our spring maintenance checklist!
Check the Exterior of Your RV
RV Maintenance
RV maintenance is the most essential item on this checklist! A properly functioning vehicle will help you stay on the road longer and hassle-free.
Tires, Bearings, Axle
When taking the RV out of its nap for the winter, make sure you check your tires, bearings, and, most importantly, your axle. Check the sidewall for weather cracking, any crack that exceeds ⅛ of an inch should be replaced immediately. Also, take a look and make sure the tread has no bumps or bulges. Lastly, check your tire pressure with a pressure gauge you trust, and make sure your spare tire is in working condition just in case.
In addition, RV manufacturers recommend repacking wheel bearings yearly. This is a great time to either do it yourself or take it into a qualified technician. While you’re doing that, have your axle alignment checked.
Power Train & Generator
Whether you own an RV or a towing vehicle, you need to check the power train. Start by checking the fluid levels for your transmission, power steering, engine coolant, engine oil, windshield washer, and brake fluids. Next, consult with your vehicle’s owner’s manual for proper levels. The engine and engine fluid levels should only be services based on the specified intervals your vehicle’s owner’s manual states. Continue by checking the operation of all lights, and ensure your emissions inspection sticker is up to date.
Batteries
Batteries commonly discharge a sum of their stored energy monthly when not in use. If you were proactive during periods of not using your RV, then you’ll be set to reinstall when you’re ready. If not, fully charge the battery(s). If your are using lead-acid batteries, after fully charging, add water to them unless the water level is below the plates. If you don’t feel confident doing all of this, please see a certified professional to do it for you. Before reinstalling your batteries, check their contacts and apply a spray to mitigate any corrosion. Lastly, check your battery connection to ensure their shielding was not damaged during your RV’s storage.
Seals and Gaskets
RV manufacturers use several different sealants for joints throughout your RV, such as the sidewall, front cap to roof material, windows, doors, and so on. As the temperature changes, your RV expands and contracts, including your RV’s sealants. Leaving your rig exposed to the elements can also make sealants dry up and even become brittle or crack, allowing moisture to penetrate into those joints. You must inspect these areas to ensure they remain in good condition. Look inside for any stains on the ceiling of your RV that may show an indication of a leak. If you find deterioration of seals and resealing is necessary, remember to remove the old sealant before applying new. We recommend Dap Kitchen & Bath Silicon Sealant or Dap Silicone Plus Door & Window Sealant to help reseal any leaks or gaps.
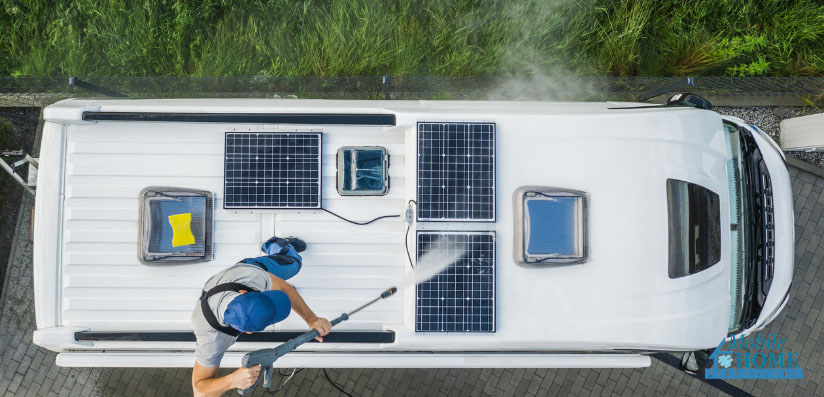
Exterior Cleaning
To clean the exterior of your RV, you first must consider what material your RV is made of. If your rig has aluminum skin, a mild detergent and water will do the trick. You can use marine-grade wax or polish as well to shine up your RV. However, if your RV is fiberglass, use a mild detergent and warm water to clean the exterior while using a soft brush or rag.
Check Awning
If your screen room or awning cover, you will want to check for condensation or even mold as it was stored. If your screen room was closed wet, it could have black mold build-up that absolutely needs to be cleaned off. The same thing goes for any patio awning – open the awning and dry or clean as needed. We recommend using Camco Full Timers Choice RV Awning Cleaner to help remove any condensation or mold buildup.
Check the Interior of Your RV
 Check Smoke and CO2 Detector
This is a given but gravely crucial for the safety of your traveling partners and your RV. Check the smoke and CO2 detector before you start camping. You will want to replace the old batteries from last season and test your machine’s operations. If you find your smoke and CO2 detector is not functioning as intended, you will need to replace this before going camping.
Check Interior Lights and Various Onboarding Gadgets
It is essential to check your lighting and replace any lightbulbs before going on your trip. Once your light bulbs are replaced, check all switches to ensure they work correctly. If they aren’t, you may have a wiring issue or a rodent/ pest infestation while your rig was in storage. The same can be said for any other onboarding gadgets you may have. This will vary from RV to RV; therefore, use your best judgment and ensure everything is working as it is intended.
Interior Cleaning & Stocking
Interior cleaning and stocking are essential to ensure your RV is ready to hit the road. The last thing you want to sleep in is a dirty bed or shower in a bathtub full of mold. So here is a brief overview of how to clean and stock up your cabinets for this upcoming season.
Air Out RV
During the long winter months of your RV being in storage, a musty smell can occur. Although cleaning and moving around items in your RV can help, airing your RV out is the fastest solution to removing the odor. Open all of your windows and doors to your RV for a few hours to ensure your RV is properly aired out.
Cleaning
Now, this should be another given, but we will say it anyway. First, give the inside of your RV a good cleaning to remove all the dust and cobwebs accumulated. Then, clean the interior with similar household products as a residential home. This is also a great time to purge your storage areas of unnecessary items and items that may need to be replaced from last season.
Leaks & Pests
While you are cleaning the interior of your RV, check for any evidence of rodents or other pests. Next, inspect the walls and ceilings for signs of damage or leaks while cleaning out cobwebs and dust from corners and compartments. If you do find a leak, try Dap Kitchen & Bath Silicone Sealant to prevent future damage.
Stocking Non-Perishable Items and Toiletries
Start to restock your rig with non-perishable items and toiletries within your RV compartments and cabinets. Ensure you are only supplying items that will not expire throughout this RV season, as well as things you will need. We understand the temptation to pack a little of everything, but overstocking your RV can be just as bad.
Check Your RV’s System and Appliances
Water System
When bringing your RV out for the first time of the camping season, your water system needs to be de-winterized and checked for leaks.
Reconnect Water Heater
Thankfully, reconnecting your water heater is pretty simple. Most RVs operate with either a three-valve or a two-valve setup. However, before reconnecting your water heater, remove any debris or mothballs from the area. Then, simply turn your valve back on you will be good to go!
Flush Out RV Antifreeze
If your RV’s water system was stored with non-toxic RV antifreeze, getting your water system up and running will be pretty straightforward. All you will need to do is run fresh water through the entire system until all traces of antifreeze are removed. However, if antifreeze was added to the freshwater holding tank, you will need to drain any remnants. Add potable water to the freshwater holding, take and turn the water pump on, and open all water faucets. When the water is running clear, turn off the pump and close the faucets.
Freshwater Tank
If you did not bypass your water heater tank before storing it, the antifreeze will also need to be drained from there. If this is the case, we suggest jumping down to removing water from the hot water heater before continuing.
Fill the fresh water tank halfway with fresh water. In a separate container, mix ¼ cup of household bleach for every 15 gallons of tank capacity with another gallon or two freshwaters. Pour the solution into your water tank. Drive around to mix the solution into the water tank.
Open your drains and turn on every faucet, including your shower head. You will want to ensure that all lines are filled with the water-bleach solution.
Removing Water from the Hot Water Heater
To purge old water out of your hot water heater, you will need to run hot water out of the facets to turn on your hot water heater. Heaters, on average, hold 6 to 10 gallons of water; therefore, you will need to run this out before using a water-bleach solution.
As stated above, fill the fresh water tank halfway with fresh water. In a separate container, mix ¼ cup of household bleach for every 15 gallons of tank capacity with another gallon or two of freshwater. Pour the solution into your water tank. Drive around to mix the solution into the water tank. Ensure your water tank has the water-bleach solution in it by running your hot water for a few minutes. Then let the solution sit for a few hours within the tank before draining.
Open your drains and turn on every faucet, including your shower head. You will want to ensure that all lines are filled with the water-bleach solution. Ensure you are also running your hot water to clear out your hot water heater’s tank.
Remove Bleach Odor
If your water has a bleach odor, we suggest adding a half cup of baking soda with a gallon of water and pouring it into the freshwater tank. Fill the tank completely with fresh water. This solution can maintain in your system for a few days. However, same as before, you will need to drive around the block to move the water within your tank and run this solution through the water lines and hot water tank to clear the odor.
Replacement Parts & Leaks
Replace any water filter cartridges you removed before storage, along with reinstalling drain plugs that should have been removed during the winterizing process. Additionally, if your water system has an anode rod, you will also want to replace this. Lastly, check to ensure your water system does not have any leaks. Look around piping, connections, toilets, and faucets for any signs of water.
Check AC and Furnace
Your AC and Furnace can be an essential part of your camping experience, especially if you plan on visiting areas with extremely high or low temperatures. Ensuring your RV can provide you and your traveling partners a sweet escape to rest can make your trip that much more enjoyable.
Air Conditioner
To ensure your AC will keep your RV cool all season, start by removing the AC unit’s protective cover. If the cover needs replacement due to damage, contact your AC’s manufacturer for replacement parts. Then remove the AC’s shroud and check the blower fan, motor, and cooling coils for any damage. In addition, remove, wash, and vacuum the condenser coil. To ensure your air conditioner stays in shape, you will want to replace the air filter. Lastly, clean all dust from the ceiling grill and cooling fans.
Furnace
Getting your furnace up and running for those chilly nights is very simple. First, remove the furnace’s cover and check lint accumulation and insect nests. Insects are attracted to the odor of LP gas, and they often build nests that can affect your furnace operations. You will want to clear these out before proceeding. Then connect to your shore power source and turn on the thermostats to check its operation. Lastly, check all LP connectors before seeing if your furnace is fully functioning.
Propane (LP) System
We highly recommend contacting your local RV service center for a times pressure drop and LPG regulator lockup test. You want to ensure your rig’s LPG supply components are operating correctly and the piping is leak-free.
Once your inspection is over, you should check the date stamps on the LPG tanks. The tanks will need to be re-valved or replaced every 10 years. If your tank is up to date, check to ensure all the appliances are turned off, and the LPG detector is functioning.
Then turn on the tanks and check for leaks with soapy water. If you smell propane, shut the tank off immediately and determine where the propane is leaking from. If the problem is discovered and resolved, then you may proceed to check your propane-based appliance.
Waste Tank Valve
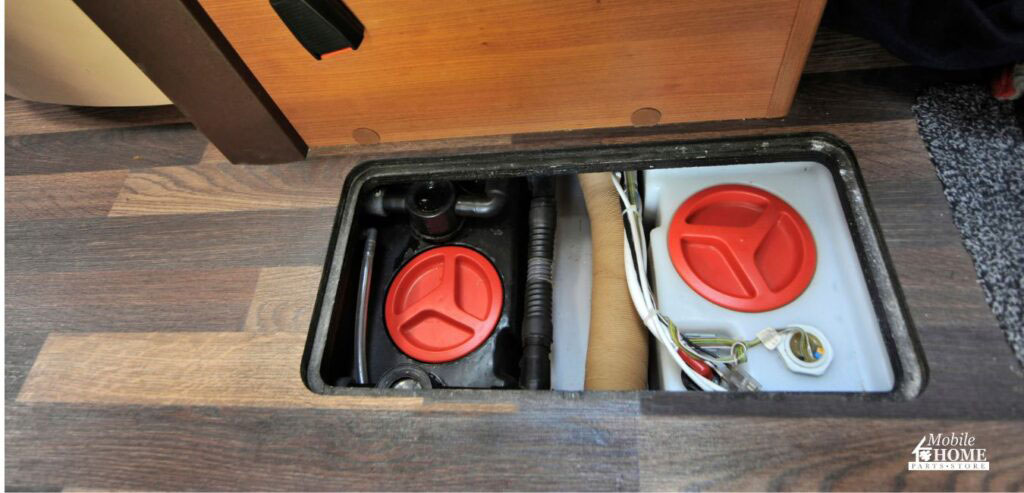 On your RV trip, the last thing you want is an issue with your waste tank valves. It is always best to perform this type of maintenance while connected to a dump station if your tank is not empty. You will want to empty the tank and check the seals on the waste tank’s valves. To check the seals, carefully move the handle slowly to ensure it’s working correctly. If it sticks, you will need to add valve lubrication to the tanks.
That’s a Wrap
Spring is right around the corner, and the road is calling our name! We hope our spring maintenance checklist will help get your RV ready to hit the road. We have also made a printable RV Spring Maintenance Checklist PDF checklist to help ensure you don’t miss a beat as you work.
If you have any additional tips and tricks on how you get your RV ready for the Spring, let us know in the comments below! And as always, if you need any RV parts and supplies, remember, Mobile Home Parts Store has always got you covered.
Tags: RV, RV life, rv maintenance, RV Spring Checklist

