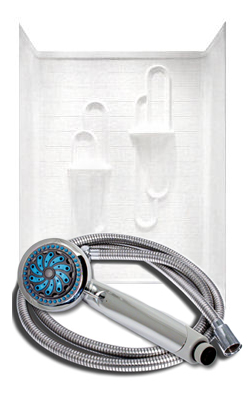
In a previous how-to article, we walked you through installing a new shower pan in your mobile home bathroom. But what if your shower pan or tub is in good shape, and you just want to replace an outdated or damaged shower surround? Good news, friends: we’ve got this handy guide for you to do just that! You don’t need to tear everything out to make this upgrade. Start by browsing our selection of surrounds for mobile home bathrooms, order the one you like best, and then get down to the dirty work!
Prep Work: Getting Ready for the Transformation
Before you dive into installing your new shower surround, a little prep work will make the process smoother. Here’s what to do:
Remove Fixtures and Accessories
Begin by taking off the spout, faucet handles, and any other fixtures mounted to the wall. Don’t forget about wall-mounted accessories like soap dishes, towel hooks, or grab bars that aren’t part of the existing shower surround. Keep all screws and small parts in a safe place—you’ll need them later!
Remove the Old Shower Surround
If your bathroom already has a shower surround, it’s time to say goodbye. Carefully remove it by prying off any trim pieces and gently pulling the panels away from the wall. Use a scraper or putty knife to remove any remaining adhesive or caulk. Be patient during this step to avoid damaging the walls underneath.
Patch and Prep the Walls
Once the old shower surround is out of the picture, inspect the walls for any damage like cracks or holes. Patch these up using appropriate wall filler or spackle, and sand them down for a smooth finish. If the walls are tiled or have a glossy finish, rough them up with coarse sandpaper or a power sander. This will help the adhesive for the new shower surround bond properly. Lastly, re-caulk the joint between the wall and the tub or shower pan. Even though this joint will be hidden once the new shower surround is installed, sealing it now adds extra protection against water damage.
Fitting the Shower Surround: Measure Twice, Cut Once
Now that the walls are prepped, it’s time to focus on fitting your new shower surround.
Mark Fixture Locations
Use the carton your shower surround came in as a template. Lay it flat and mark where the spout, faucet handles, and showerhead will need to protrude through the surround. Then, transfer these measurements onto the actual shower surround panels. Double-check your measurements—no one wants to end up with a hole in the wrong place!
Carefully cut out the openings using a hole saw for circular cuts or a jigsaw for larger or irregular shapes. If you’re nervous about cutting into your brand-new shower surround, practice on a piece of scrap material first.
Test Fit the Shower Surround
If you’re installing a multi-piece shower surround, check the manufacturer’s directions to see if the panels need to be installed in a specific order. Typically, you’ll start with the back panel and then move on to the side panels. Hold each panel in place with the help of an assistant or use temporary supports. Mark the top and side edges on the wall lightly with a pencil for reference.
Trim Panels if Necessary
Not all bathrooms are the same size, especially in mobile homes where space can be a bit tight. If any panels need trimming to fit your space, use a utility knife for lightweight materials or a power saw for heavier ones. Always wear safety goggles and cut slowly to avoid chipping or cracking the material.
Attaching the Shower Surround to the Wall: Stick with It
The adhesive step is crucial for a long-lasting installation. Here’s how to make sure everything sticks:
Apply Adhesive Properly
Use adhesive specifically designed for shower surrounds—regular glue won’t do the trick. Apply the adhesive to the back of the panels as per the manufacturer’s instructions. Some adhesives require you to let them sit exposed to air for a short period before attaching the panels. Skipping this step can weaken the bond, causing your new shower surround to peel away over time.
Install the Shower Surround Panels
Starting with the back panel, align it with the marks you made earlier and press it firmly onto the wall. Use even pressure across the entire panel to ensure a good bond. Repeat this process with the side panels, making sure all edges align properly. A rubber roller can be helpful to smooth out the panels and eliminate any air bubbles.
Let the Adhesive Cure
Patience is key here. Don’t use the shower until the adhesive has cured for the time specified by the manufacturer, usually at least 24 hours. Introducing moisture too soon can compromise the adhesive, leading to a less-than-perfect installation.
Finishing Touches: Bringing It All Together
You’re in the home stretch! Now, it’s time to put everything back together and add those final details.
Reinstall Fixtures
Replace the spout, faucet handles, showerhead, and any other accessories you removed at the beginning. Make sure everything is tightened securely, but avoid over-tightening, which can crack the new shower surround.
Seal the Joints
Finally, seal all the joints and edges with a high-quality, waterproof shower caulk. Pay special attention to the corners and where the shower surround meets the tub or shower pan. Consider using a mold-resistant caulk for added durability. Let the caulk dry according to the manufacturer’s instructions before using the shower.
Enjoy Your New Shower Surround!
And there you have it—a brand-new shower surround that transforms your bathroom from drab to fab! With a little effort and some basic DIY skills, you’ve given your mobile home bathroom a fresh, updated look that’s both functional and stylish.
Shower Surrounds From Mobile Home Parts Store
Updating your shower surround is a cost-effective way to rejuvenate your bathroom without a complete overhaul. Plus, there’s something incredibly satisfying about tackling a home improvement project on your own. So go ahead and give yourself a pat on the back!
Ready to get started? Browse our wide selection of shower surrounds at Mobile Home Parts Store to find the perfect fit for your bathroom. From durable materials to stylish designs, we’ve got everything you need to make your mobile home bathroom feel brand new. Our customer service team is always here to help you choose the right one and answer any questions you might have.
Happy renovating, friends! Here’s to many relaxing showers in your updated space.
Updated on November 20, 2024: This article has been refreshed with the latest insights, tips, and product recommendations to ensure it provides the most accurate and helpful information for our readers.
Tags: bathroom, diy, mobile home bathroom, shower surround


