


Moisture is sneaky. One long shower can fog windows, bead along walls, and settle deep into corners where the air doesn’t quite reach. Over time, that moisture can lead to peeling paint, soft trim, and mold that seems to appear overnight. A dependable bathroom vent fan makes all the difference—quietly pulling damp air outside before it can sink in.
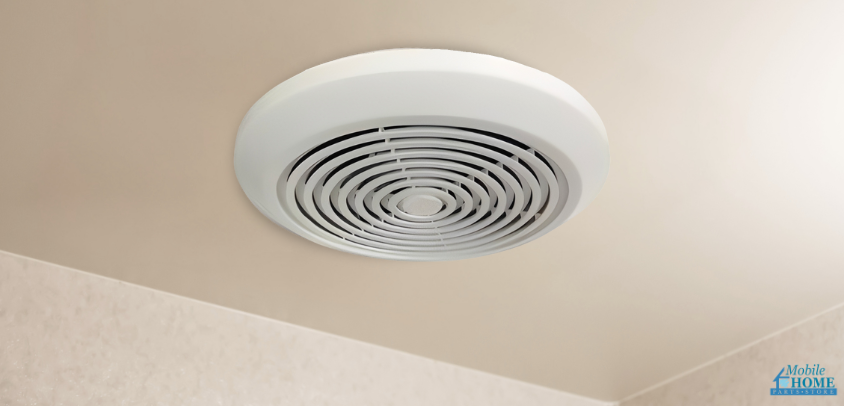
The Ventline 90 CFM model fits the task well. It’s compact, familiar, and designed to work steadily without much fuss. If you’re comfortable with basic tools and taking your time, installing one is a weekend project—steady, manageable, and well worth the effort when you see how much fresher the room feels.
Let’s walk through the process from planning to final test.
Safety First: What to Know Before You Start
Any project with wiring deserves a level head and a slow start. Head to the breaker panel and turn off power to the bathroom. Use a non-contact tester to confirm it’s really off. If your panel can’t be locked out, leave a clear note so no one flips the switch back on mid-project.
A few other points worth slowing down for:
- Don’t pair this fan with a solid-state speed control.
- Installing over a shower or tub? It must be on a GFCI-protected branch circuit.
- Vent outdoors only—never into an attic, roof cavity, or underbelly.
- Keep insulation and debris clear of the fan housing and duct.
- When cutting into a ceiling or roof, be mindful of hidden wires or pipes.
If wiring feels beyond your comfort level, call a licensed electrician for that portion. There’s no pressure to do every step alone. Sometimes sharing the task is the smartest move.
Tools & Supplies
Gathering everything at once keeps you from crawling in and out of the bathroom mid-install. You’ll need:
- Ventline 90 CFM fan
- Drill/driver + #8 screws
- Stud finder, tape measure, pencil
- Drywall saw or hole saw
- Wire connectors + supply wiring (as required by code)
- Rigid metal duct or flexible duct
- Foil HVAC tape rated to 200°F or tie wraps
- Roof vent cap or existing roof connection
- Exterior-grade sealant
- Non-contact voltage tester
- Safety glasses
Set everything on a towel nearby so small pieces don’t disappear.
Choose the Right Spot for Your Bathroom Vent Fan
Ventilation works best when air can move freely. Aim for a location between ceiling joists near the most humid part of the room. A straight shot to the roof is ideal—shorter ducts move air better and make the fan quieter.
Mark an 8″ circle for the opening. If you’re replacing an older unit, double-check the rough opening size to be sure the new fan body fits cleanly. Small mismatches can be fixed, but confirming ahead saves patching later.
A quick trick: Drill a pilot hole first. Slip a flashlight inside and take a look. It’s an easy way to avoid unpleasant surprises hiding above the ceiling.
Cut the Opening
Take your time here. Clean cuts make everything else easier.
Follow your circle with a drywall saw. Light pressure is enough. If you’re planning to install or move a roof cap, line up the roof opening directly above this spot. That straight path keeps airflow strong and installation simple.
Vacuum or wipe out dust so the housing sits smoothly. Little details—like brushing off loose drywall crumbs—help the grille rest evenly later on.
Wire the Bathroom Vent Fan
With power still OFF, remove the fan’s wiring-compartment cover. Route supply wiring through the built-in strain relief. Match connections to the diagram: hot to hot, neutral to neutral, ground to ground. Keep wiring neat and tucked—no contact with ductwork.
When connections are done:
- Snap the wiring cover back in place as instructed.
- Leave the motor plug disconnected until the fan is installed.
If you’re unsure which wires are which, pause. This is one of those times when an electrician can step in for a quick, safe assist before you continue with the rest.
Run Ductwork & Vent Outside
Good ventilation depends on where the air ends up.
Flexible Duct
Slide the duct over the fan collar. Secure it firmly using foil HVAC tape rated to 200°F or a tie wrap. Pull the duct up through the roof opening, trim excess, then connect it to the roof cap. Seal joints tightly for a clean, airtight path that meets HUD 3280.710(3) and 3280.715(c) standards.
Rigid Metal Duct
Align the duct connection over the rough opening and secure per the roof-cap instructions. Seal seams to prevent leaks. Secure the roof flange and use exterior-grade sealant around the flange for a watertight finish.
Working overhead can feel awkward. Take breaks. A solid connection here protects both the roof and the fan long-term.
Mount & Finish the Bathroom Vent Fan
Now the satisfying part—setting the fan into place.
Lift the fan body into the opening, guiding it into the duct connection. Center it and secure to the ceiling with #8 screws. Check that the housing is snug without over-tightening.
Before replacing the cover:
- Look for debris inside the housing.
- Spin the fan blade gently. It should move without scraping.
Reconnect the motor plug inside the wiring compartment. Snap the grille into place—most attach with spring clips and settle flush against the ceiling.
If your fan sits over a bathtub or shower, check once more for GFCI protection. It’s a small detail with big safety benefits.
Test, Tune & Care for Your Bathroom Vent Fan
Head back to the panel and restore power. Flip the switch. The fan should start smoothly, without rattles or rubbing. It may sound a bit new—the hum of a job well done.
Step outside and feel near the roof cap. Warm, moist air should be moving out as the damper opens. If airflow feels weak:
- Look for crushed duct sections.
- Keep bends gentle.
- Reseal loose joints.
- Make sure the flap on the roof cap opens freely.
A little routine care keeps airflow high:
- Wash the grille with warm water and mild soap every so often.
- Vacuum dust from the housing and wipe the blades gently.
- Skip abrasive cleaners; they’re not needed.
If your mirrors stay fogged even after the fan has run a while, try this:
Keep it running during your shower and 15–20 minutes afterward. Also make sure your bathroom door has a small gap underneath so fresh air can enter.
A healthy bathroom vent fan is noticeable in the best way—it leaves the room feeling lighter, less damp, easier to breathe in.
When Repairs Become Replacements
Some parts naturally wear over time. You might start to see:
- A yellowed or cracked grille
- Tape that doesn’t hold
- Sealant that’s dried out
All of these are small, easy fixes.
If the fan hums, rattles, or doesn’t start smoothly, check the mounting screws and wiring compartment. Sometimes the solution is as simple as tightening a screw. But if it still struggles, the motor may be nearing the end of its life. Replacing the unit is straightforward—you’ll follow the same steps: power off, disconnect, remove, then swap in the new fan.
The good news? Once you’ve done it once, everything goes faster the next time.
Conclusion: You’ve Got This
Take a breath. This is a doable DIY. Go slow, measure twice, keep your cuts clean, and make sure every connection is snug and sealed. Most fixes are simple—adjust a bend, retape a joint, check the GFCI, try again. You’re not racing; you’re building something that’ll keep your bathroom dry and comfortable for years.
If you need a spare grille, heat-rated tape, a roof cap, or a new bathroom vent fan, we’re here for you. Mobile Home Parts Store has the parts that fit—and real help if you get stuck—so you can finish strong and feel good about the work you did.
For a deeper look at wiring details, safety standards, and installation diagrams, download the full Ventline 90 CFM Bathroom Ceiling Exhaust Fan installation PDF.
Tags: bathroom exhaust fan, diy, exhaust fans, how to, mobile home bathroom exhaust fan, mobile home diy, mobile home exhaust fan, mobile home exhaust fans

