


You go to wash your hands or start a load of laundry, and the faucet gives you… nothing. No stream. Maybe a weak hiss. It’s frustrating, and it can feel urgent fast—because water isn’t optional, and you’re immediately wondering what’s happening inside the walls or under the floor.
In cold weather, that sudden no-flow situation often points to frozen pipes. The tricky part is what you can’t see: a pipe can be stressed or cracked while it’s frozen, and you usually won’t see a leak until the ice melts and water starts moving again. That’s why the safest approach is controlled heat, some patience, and staying close while the thaw happens.
This guide covers the safest ways to thaw a line, what to avoid, and what to check once the water returns.
Before You Thaw Anything, Get Your Bearings
It’s tempting to jump straight to heat. A quick setup first keeps this from turning into a bigger repair.
Start by opening the faucet that isn’t working. If you know it’s the hot side, open hot. If it’s the cold side, open cold. If you’re unsure, crack both handles. The goal is to give melting water (and pressure) a place to go as the ice loosens.
Next, locate your main shutoff and make sure you can get to it immediately. If a fitting splits during freezing, you want to shut the water off fast once thawing begins.
Take a Moment for Electrical Safety
Now think about electrical safety. Many thaw methods use electricity, and you’re working close to plumbing:
- Plug into a GFCI outlet when possible.
- Keep cords out of damp areas and away from standing water.
- Don’t set tools on wet ground or wet insulation.
- Stay nearby while anything is running.
Two important “don’ts” before you go further: don’t use a torch or open flame, and don’t apply direct heat to a pipe that runs alongside a gas line. If there’s any chance you’re close to gas piping, that’s a professional call.
At this point, you’re set up to thaw without rushing.
How to Find Where the Frozen Pipes Are
Finding the frozen section saves time and helps you avoid heating the wrong spot for an hour.
Start by checking other fixtures. If one faucet is out and everything else works, the freeze is likely in the branch line feeding that fixture. If multiple faucets are weak or dead—especially on the same side of the home—the freeze may be closer to the main supply line.
Start With the Areas That Freeze First
From there, check the areas that tend to take the worst hit in cold air and wind:
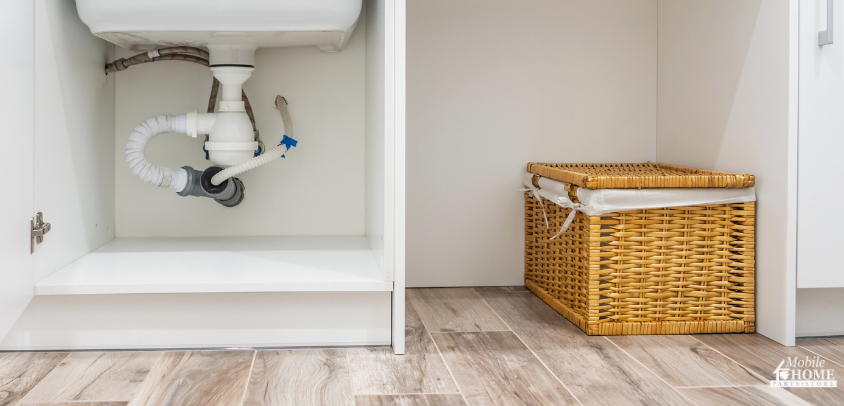
- Under sinks and behind plumbing access panels
- Near exterior edges and along the perimeter
- Exposed runs underneath the home
- Areas where insulation has shifted, sagged, or gotten damp
If you can safely access the underside, look for frost on the outside of a line or a section that feels noticeably colder to the touch. Sometimes you’ll find a straightforward cause, like a bare stretch of pipe sitting in moving air.
Signs the Pipe May Be Under Pressure
If you see a bulge in the pipe, slow down and be extra cautious. A bulge can mean the pipe expanded under pressure. It doesn’t automatically mean it failed, but it does mean you’ll want your shutoff within reach and your heat gradual.
If the suspected frozen area is in a place you can’t reach, the safest approach is often to warm the surrounding area rather than trying to force heat into a hidden section.
Ground Rules for Thawing Pipes
Before you pick a method, keep these rules in mind. They apply every time.
- Keep the faucet open while you thaw. That open faucet is a pressure relief and a progress check.
- Use controlled heat. High, sudden heat can damage pipe material and put stress on fittings.
- Work in a direction that lets water move out. When possible, warm the pipe closer to the fixture first, then move along the frozen section. That helps melting water travel toward the open faucet instead of getting trapped behind ice.
These steps don’t slow you down. They keep the job from turning into a repair.
Safe Ways to Thaw Frozen Pipes (Use What Fits Your Situation)
You don’t need every tool in the world. You need one safe heat source and a method you can control.
Heat Tape or Heating Cable
Heating cables is one of the most reliable options because it warms gradually.
A few non-negotiables:
- Use heat tape that’s certified by a nationally recognized testing laboratory and rated appropriately for manufactured-home applications.
- Do not wrap it over itself. Overlapping can overheat and become a fire hazard.
- Follow the product instructions for placement, fastening, and plugging in.
- Plug into a GFCI outlet whenever possible.
If you’re using heat tape as a thaw method, expect it to take time. It’s not instant, but it’s easier on the plumbing.
Using a Hair Dryer on an Exposed Pipe
A hair dryer works well when you can see the pipe and reach it.
Hold the dryer a few inches away and keep it moving along the frozen section. Think “warm the whole area evenly,” not “hammer one fitting until it’s hot.” If you’re doing this under a sink or in an access bay, stay on dry footing and keep cords out of damp spots.
Heating Pads and Electric Pipe Wraps
For a short frozen section, a heating pad can help.
Wrap it around the pipe and secure it loosely. Use a low or medium setting and check it regularly to make sure everything stays dry and stable. It’s hands-off in the sense that you’re not holding a tool the whole time, but it still isn’t something to leave unattended.
Using a Heat Lamp Safely
A heat lamp can help when you need warmth without direct contact.
Set the lamp at least a foot away from the pipe and keep it on stable, dry ground. Protect nearby surfaces so nothing scorches. A piece of foil or metal backing can help reflect heat toward the pipe, but the main point is keeping heat controlled and monitored.
The Hot Towel Method
Wrap the pipe with thick towels or cloth, then pour hot water over the towels. Re-wet the towels as they cool. You’re basically creating a warm jacket around the pipe.
Use hot water, not boiling. Boiling water isn’t necessary and can be harsh on some materials.
Warming the Space Around the Pipe
If the frozen section is behind a panel or inside a cavity, warming the area can be more effective than trying to aim heat at a pipe you can’t reach.
Open cabinet doors to let warmer air circulate. If there’s a draft, block the cold airflow temporarily. Raise the temperature in that area and give it time. It can feel slow, but it’s often the safest approach in tight spots.
What to Do the Moment Water Starts Flowing Again
The first sign is usually a weak trickle. Then it builds.
Once you see water, let it run for several minutes. That helps push out remaining slush and confirms the line is open. Then check for leaks immediately—especially at joints, fittings, and any exposed sections under sinks or in access areas.
What to Look For as Pressure Builds Back Up
This is also the moment to pay attention to small changes: a drip where there wasn’t one before, damp insulation, water staining, or a new wet spot. Those can mean a split fitting or a crack that only shows once pressure returns.
If you see any leak at all, shut off the main water supply and handle the repair before returning everything to normal. Even a small crack can release a lot of water quickly.
When Thawing Isn’t Safe to Handle on Your Own
Some situations aren’t worth improvising. A plumber is the right call when the risk is high or the frozen section is hard to reach.
Call for help if:
- You can’t locate the frozen area, and multiple fixtures are out.
- The pipe runs near a gas line or through an unsafe space.
- You’ve tried safe methods, and nothing changes.
- You suspect damage (bulging pipe, visible cracks, water stains, new damp spots).
Knowing when to stop is part of protecting your home.
How to Keep Frozen Pipes From Coming Back
After things are flowing again, prevention comes down to reducing exposure and keeping vulnerable lines warmer—especially in the spots that consistently take the worst hit.
Keep indoor temperatures steady during extreme cold. Seal drafts and cold air leaks. Make sure skirting is intact and secure. Insulate exposed pipe runs. If you’ve got known trouble areas under the home, properly rated heat tape can be worth it when installed correctly. And during the harshest conditions—especially cold plus wind—a slow drip can help, though it’s not always necessary.
If freezing has happened more than once, treat it like a pattern. The fix is usually a mix of airflow control, insulation, and safe heat protection in the sections that keep getting exposed.
Thawing Under Pressure
Thawing frozen pipes is mostly about doing the steps in the right order: open the faucet, apply controlled heat, stay nearby while it thaws, and check carefully for leaks the moment water returns. It’s not complicated, but it does require attention.
When you’re ready to winterize or repair what the freeze exposed, Mobile Home Parts Store can help with manufactured-home-rated heat tape, pipe insulation, and the plumbing fittings you need to get everything back in solid working order.
Tags: Frozen pipes on a mobile home, how to, mobile home frozen pipes, mobile home plumbing, Prevent frozen pipes on mobile homes

