


There’s nothing quite like hitting the road in your RV; seeing the streets roll out before you and knowing the first leg of a new adventure and experience has begun. However, part of what makes RVing so great is that you get to take your home (or part of it) along with you. Having all those creature comforts at your fingertips can soothe even the most nervous of travelers. Still, finding space for all those amenities and keeping them organized? That’s a problem all on its own.
Lucky for you, we’ve compiled a list (timeframes included!) to help: 15 cheap and easy RV hacks you can use TODAY to save space and keep organized.
Image courtesy of Kevin Simmons. Licensed via Creative Commons 2.0.
1. Prevent flying knick-knacks, cutlery, and food with old Tupperware and Velcro dots (30-40 Minutes)
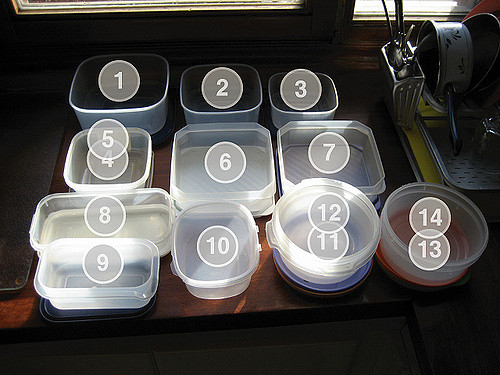
Image courtesy of Boca Dorada. Licensed via Creative Commons 2.0.
If you’re like most people, you’ve got a cupboard or drawer full of mismatched Tupperware and stray lids (despite those spring cleaning resolutions). Rather than leaving them to collect dust, repurpose them to keep all your would-be projectiles in place. After all, RV travel tends to toss things around.
Take 5-10 minutes to fish out a variety of sizes and pair them with accompanying lids.
Then, once you have a set, plan out the best way to place them into your cupboards/drawers – keeping in mind that you can always stack up. After you’ve got a general layout, attach four Velcro dots to the bottom corners of the Tupperware with the other half of the dots on top. Be sure to leave the paper on!
When you are ready to set the Tupperware, simply remove the paper to reveal the adhesive and fix the bins where you like. Voila! A stable container you can fill with anything from dishware to loose change.
*Try labeling each container so you know what’s inside.
2. Keep your fridge neat and secure with binder clips or clothespins (5-10 Minutes) (source)
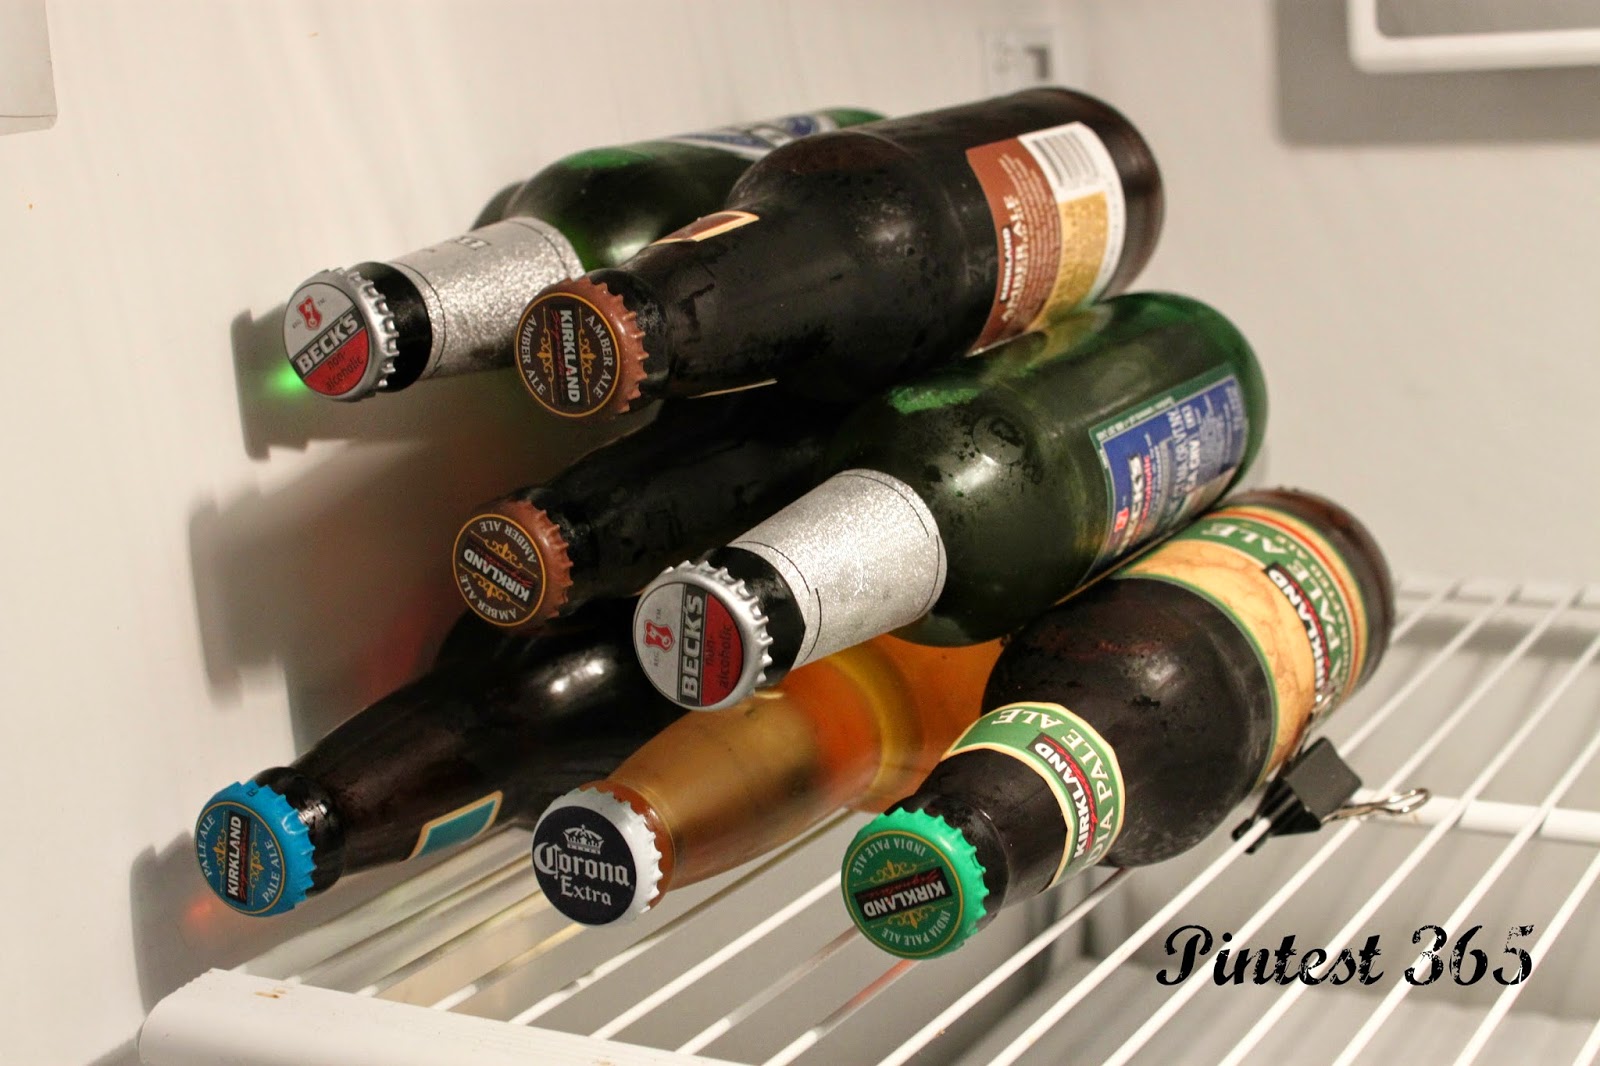
Image courtesy of Pinterest 365.
The last thing you want after a long day of travel is to open your fridge and have most of its contents come out at you.
If you’re an avid RVer, there’s a strong chance you’ve experienced this sort of wreckage at least once or twice. Not only are all those loose bottles and jars in a moving RV fridge a potential hazard, but they can be a noisy irritant as well.
To prevent the constant clink, take one to two binder clips or clothespins and attach them, evenly spaced, to the wire shelves in your fridge. If you’re using binder clips, try linking over two of the wire rungs. If using clothespins, you may only need to go over one. However, make sure you hook each from the top with their arms up.
You can then stack bottles or jars between them to avoid them sliding around!
3. Free up limited shower space with suction cups and rubber bands or hair ties (5-10 Minutes) (source)
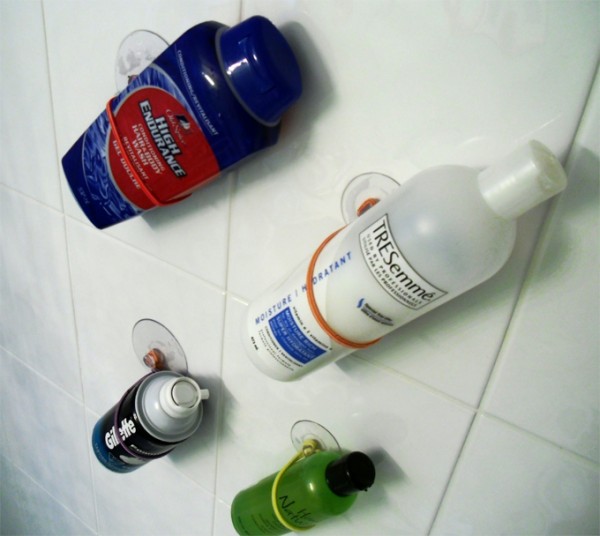
Image courtesy of Dollar Store Crafts.
Though having a shower in an RV is a gift, the amount of space you have in one is usually anything but. Chances are your shower is not only cramped, but limited on shelves and storage, too. Fortunately, you are only five minutes from an easy solution!
Take advantage of the free wall space by lacing rubber bands or hair ties through the holes in suction cups. Then, simply slip your shampoo, shaving cream, body wash, and anything else between the bands and attach them to the wall.
4. Double up your shelf storage with a tray divider (15-20 Minutes) (source)
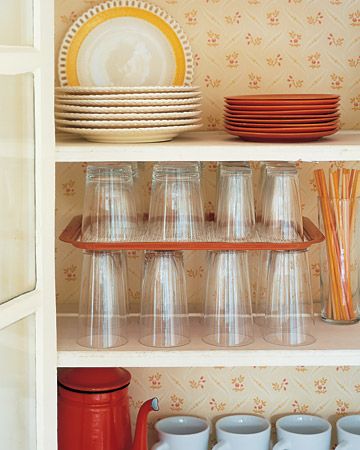
Image courtesy of Martha Stewart.
If you’ve got high shelves, this quick storage hack is ideal. Simply line a smaller tray (preferably one close to the width of your cupboard) with a thick grip shelf liner. Then line up your larger glasses into two rows on the bottom shelf, upside down. Set the lined tray on top and arrange all smaller glasses on top of it. That’s it!
*Feel free to substitute the tray with a platter or sturdy piece of cardboard instead.
5. Upcycle old coffee and food cans for utensil storage (2-3 Hours) (source)
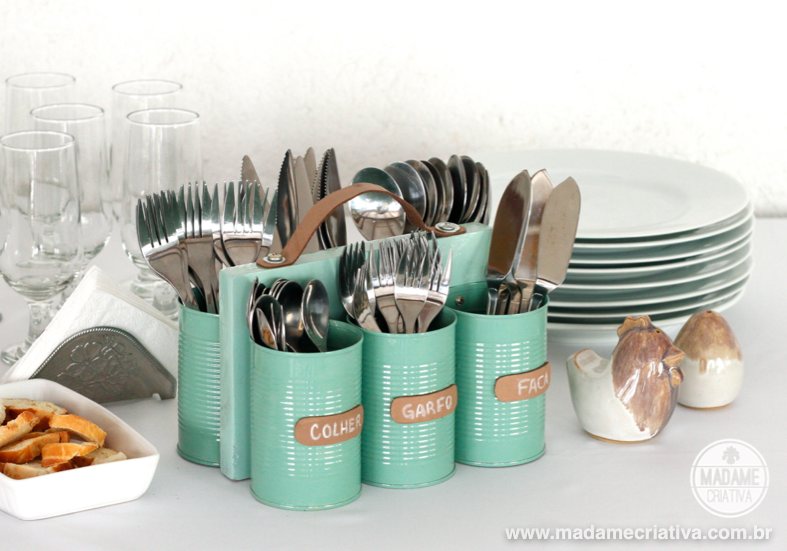
Image courtesy of Madame Criativa.
Instead of tossing out old coffee canisters, tea tins, and food cans, clean them up and give them new life! Though it can take a bit of elbow grease, repurposing old containers can be a unique and cheap way to get more storage. You can even clean and upgrade them in batches to save time!
Once the cans are empty, clean them thoroughly with dish soap and warm water – removing any outside paper before washing. For cans with wrappers, you may find a strip of sticky adhesive even after cleaning. To remove this quickly, attach a piece of paper towel over the strip of glue and coat it in Goo Gone. Leave this to sit for 10 minutes before rubbing it off with a wet rag.
After the adhesive has been removed, paint the bottom rim of the can with a layer of clear nail polish. This will prevent the tin from leaving rust stains on your counters if it gets wet.
From this point on, feel free to paint the cans however you please! Chalk paint works especially well if you want an easy way to change labels.
*If you don’t have any Goo Gone, you can substitute Rubbing Alcohol or Cooking Oil.
6. Get produce off the counter with a DIY fruit hammock (1-2 Hours) (source)
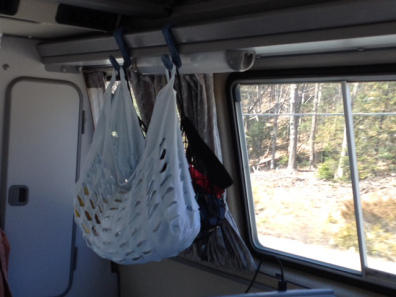
Image courtesy of A Bus and Us.
Since counter space in an RV is usually limited, it’s best to utilize any available vertical space. A simple way to do this is by employing the use of a fruit hammock. Despite its title, you can use a fruit hammock for more than just fruits. Try filling it with onions, potatoes, and other vegetables. You can even throw household items like paper towels or remotes inside!
To make your own hammock, simply take an old t-shirt (ideally a men’s medium or large), turn it inside out, and sew the bottom hem closed. Then, take a pair of sharp scissors and cut a modified U shape across the chest – think of a cowboy hat with wide rims. You should also keep in mind that the closer you move towards the sleeves, the deeper your hammock will be.
You should then cut 2-3 inch horizontal holes at the highest part of the shirt – opposite the bottom seam – on each side for handles. After this, feel free to cut even slits throughout the shirt to mimic a net pattern.
*If you don’t have any sewing supplies, feel free to use hot glue.
7. Transform your leftover cereal, waffle, and granola boxes into DIY dividers (2-3 Hours) (source)
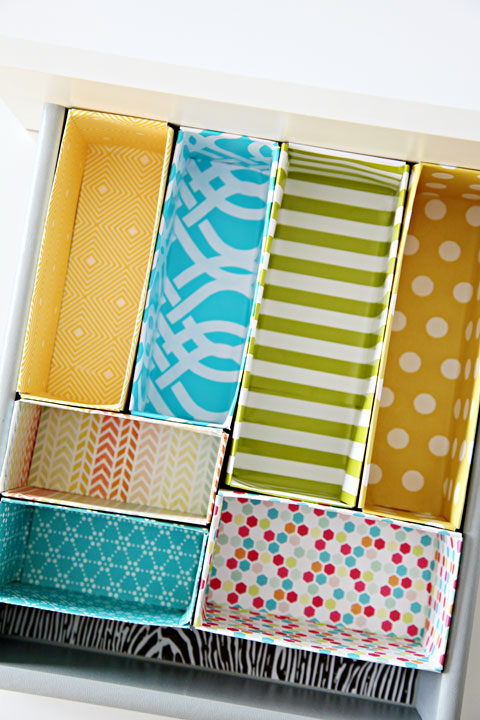
Image courtesy of iheartorganizing.
Rather than spending money on drawer dividers or magazine holders, upcycle your old cardboard into DIY dividers instead! Since you can vary and customize your sizes, these dividers/holders can be used all over your RV. Try placing them in cupboards, drawers, even your fridge!
The key to these dividers is making sure you measure out the height and width of wherever you’re looking to place them. For example, if you’re looking to organize a drawer, first take the drawer out. Then arrange the boxes neatly inside and mark the height of the drawer on each. After you have a clear line on every box, simply cut down where you marked. It’s a cinch!
*To reinforce and bring more life to the boxes, try covering them with old wrapping paper or shelf liner.
8. Utilize 3M Velcro fasteners to hang pictures without damaging walls (30-40 Minutes) (source)
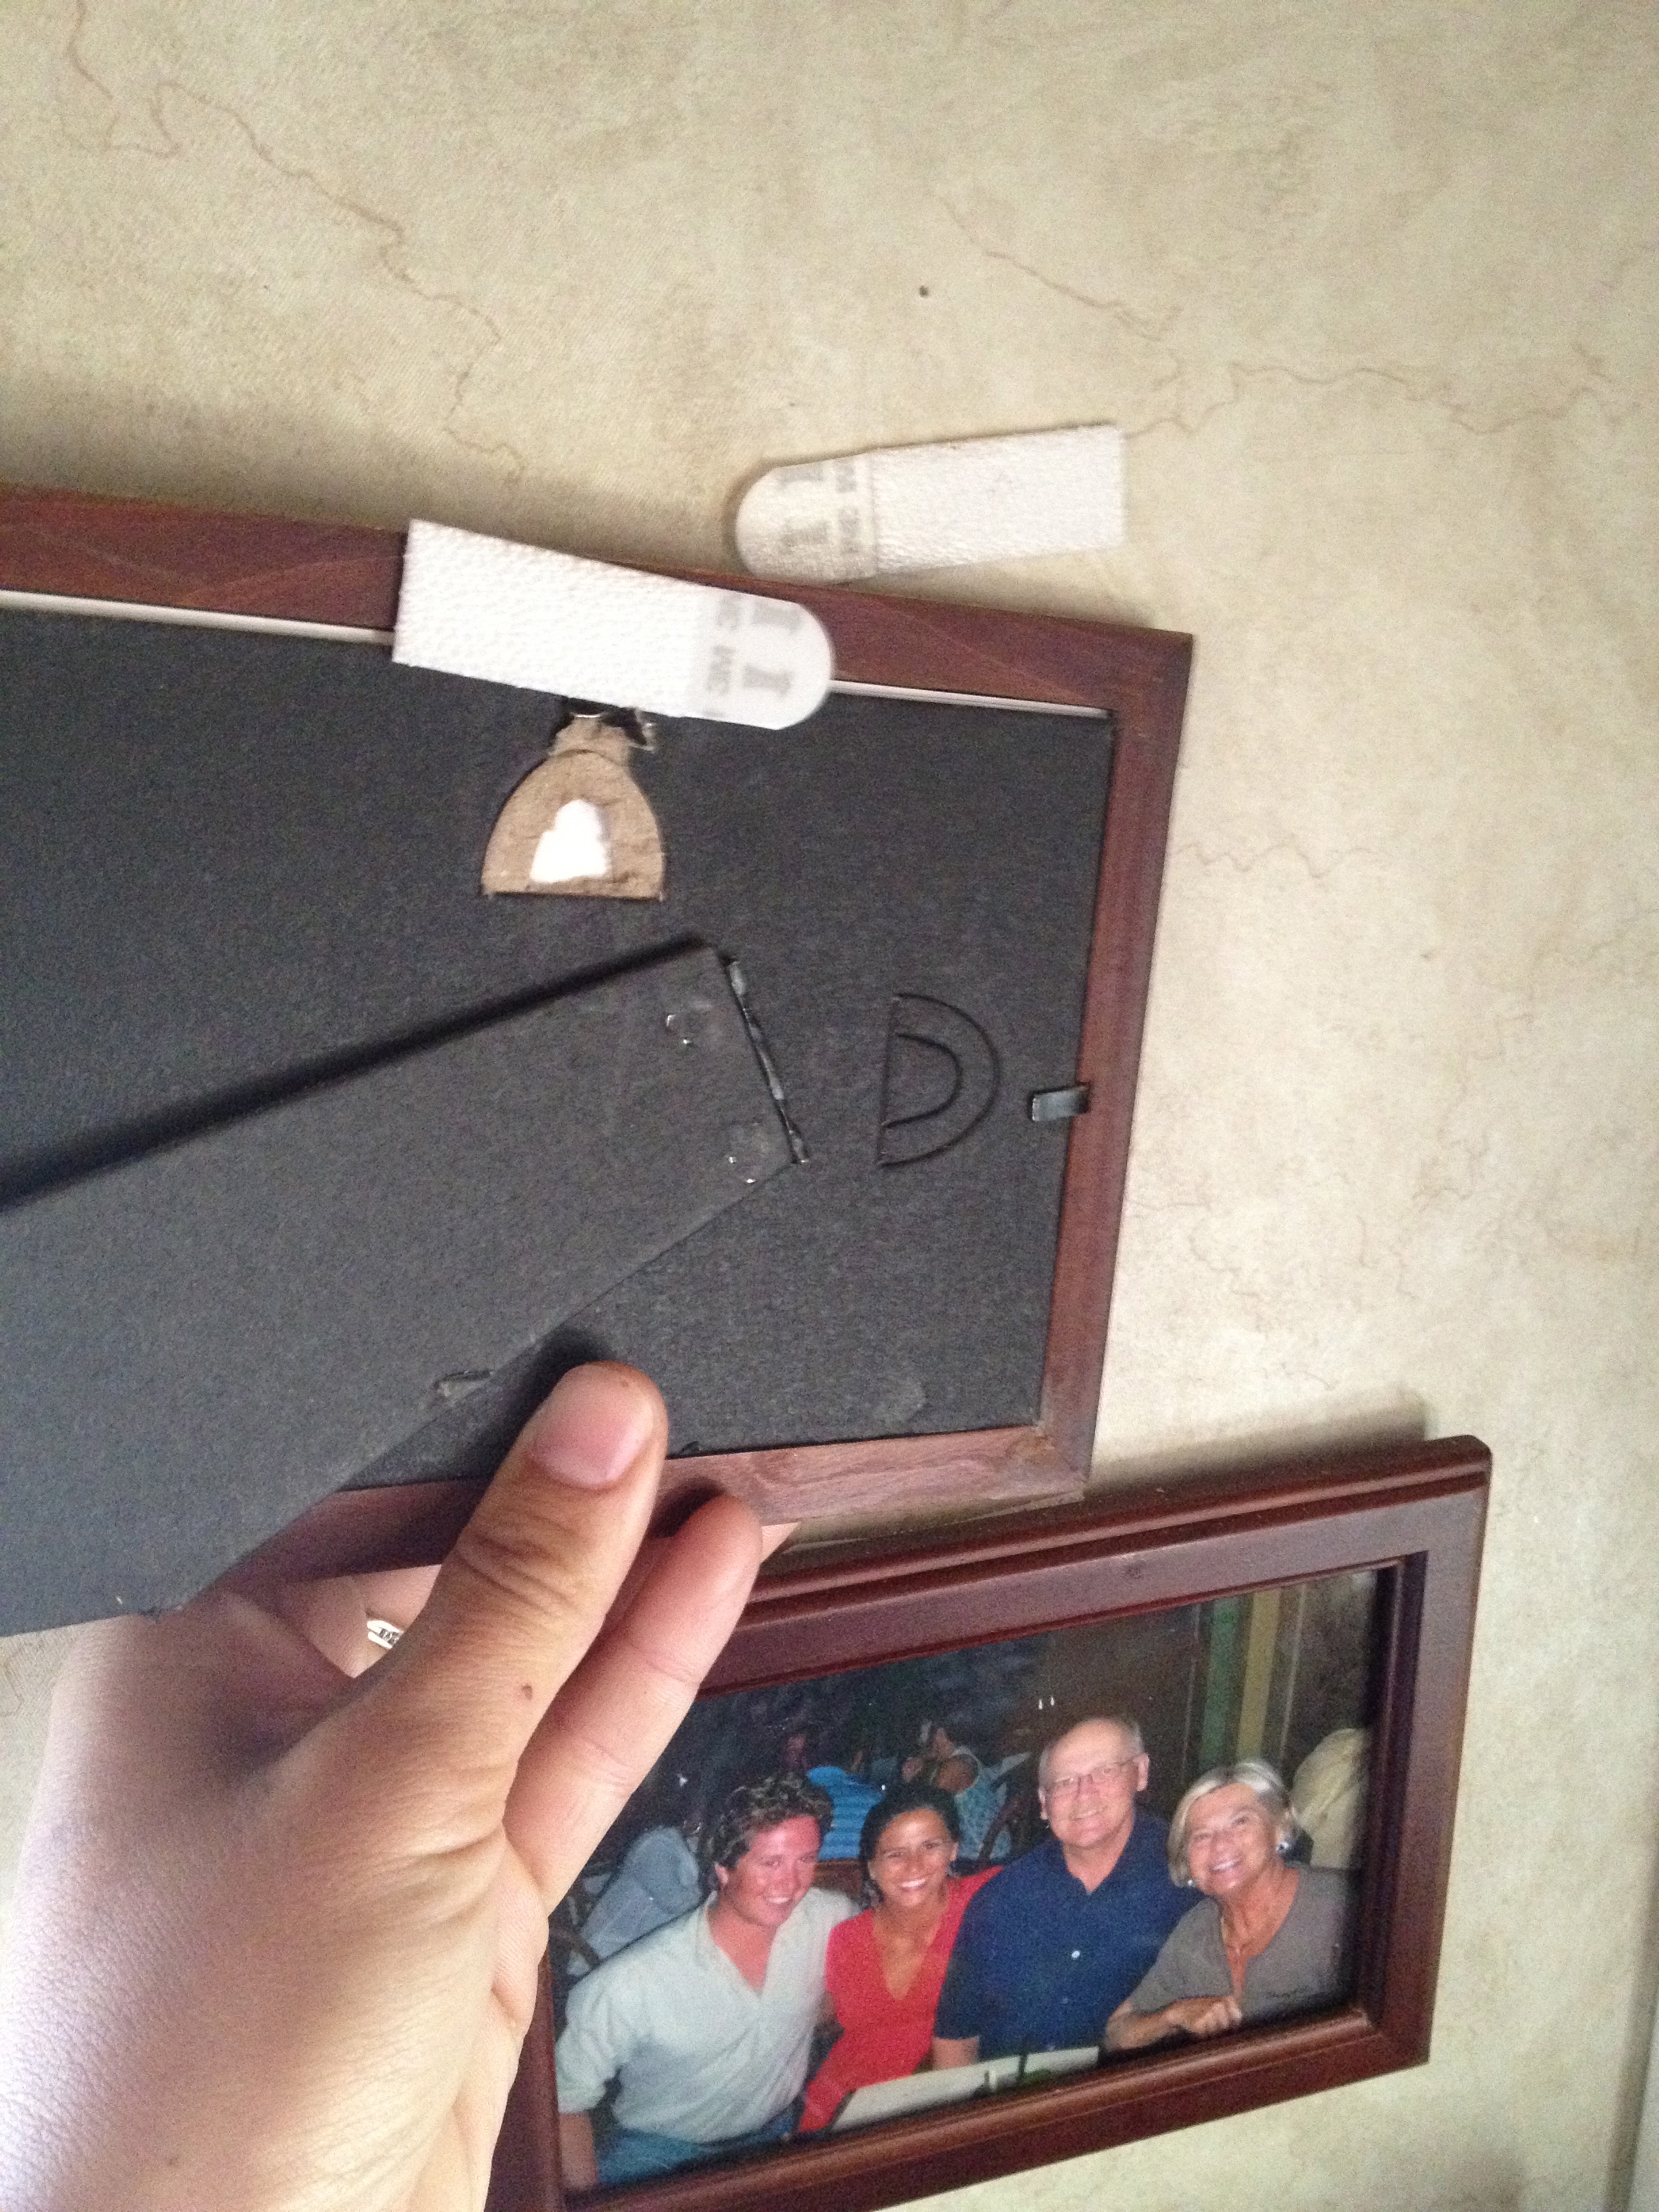
Image courtesy of Follow the High Line Home.
Hanging items in an RV can sometimes be a struggle. As the walls aren’t always thick or sturdy, using typical items like nails and screws can be incredibly destructive. To prevent unnecessary damage, try trading out the usual hardware for 3M Velcro fasteners!
Take a strip or two and attach them to the top (or top and bottom) of the picture frame. Depending on the size, you may even want to attach strips to all four sides of the frame. Once you’ve placed the initial 3M strips, simply remove the paper to reveal the adhesive and stick them to the wall.
*Be sure to plan out and mark where you want to put the pictures before securing them to the wall.
9. Free up cupboard space by pinning all plastic and trash bag boxes to the inside of your cabinet doors (5-10 Minutes) (source)
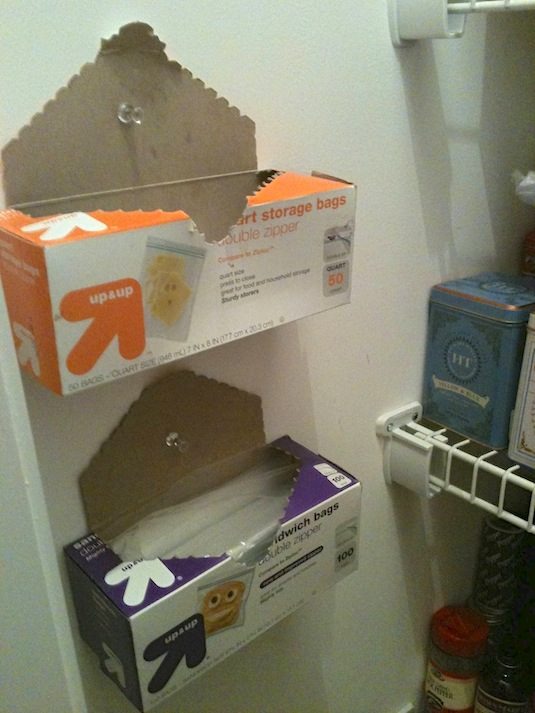
Image courtesy of The Wandering RV.
This is a quick trick for freeing up floor space. All you need is a couple of thumbtacks – one per box should be enough.
Locate the perforated area on each box and push in and lift up until you have a wide triangle. Then, just stick a thumbtack into the top and attach it to the back of your cupboard doors.
Ta-dah! Now you have not only opened up more space, but have easy access to all your plastic bags.
10. Double up your closet space with pop tabs (15-20 Minutes) (source)
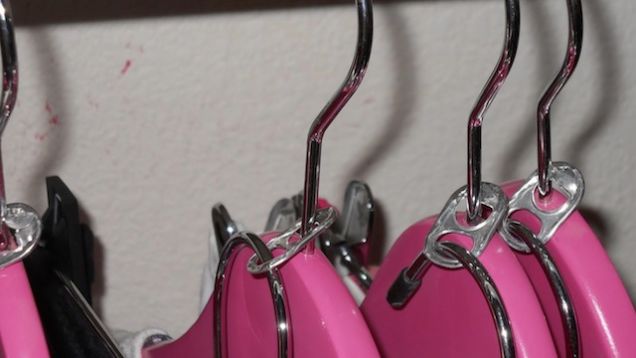
Image courtesy of Life Hacker.
Trying to stuff a bunch of clothes into a tiny closet is nightmare, especially if you need the space to store other things as well. However, utilizing old pop tabs can help you eliminate the bulk. Rather than expanding outwards, move downwards!
Just take a pop tab and loop it over the top of a hanger, then attach another hanger to the bottom of that. Do this over and over until you have multiple hangers linked to one.
11. Create clever fridge storage with old six pack containers (5-10 Minutes) (source)
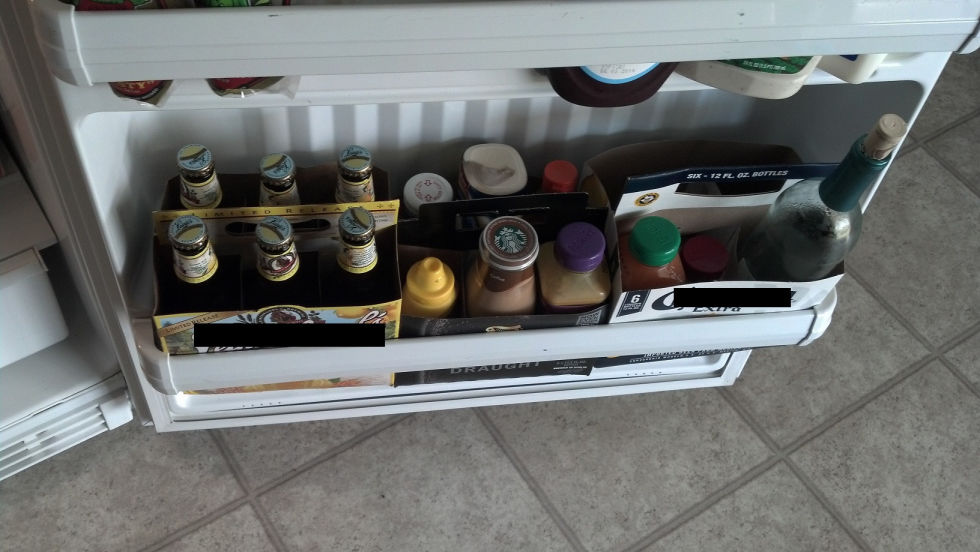
Image courtesy of Good House Keeping.
Rather than tossing out or recycling your old six pack containers, repurpose them into mini-storage units and carriers. This works especially well if you have shallow door space. The boxes not only keep your drinks and sauces organized, but offer more support to larger items that may have fallen out previously.
Plus you can pair items to create easily moveable sets! Try putting together an “outdoor cookout” pack with ketchup, mustard, relish, hot sauce, and all your other favorites.
12. DIY drawer dividers with egg-cartons (10-20 Minutes) (source)
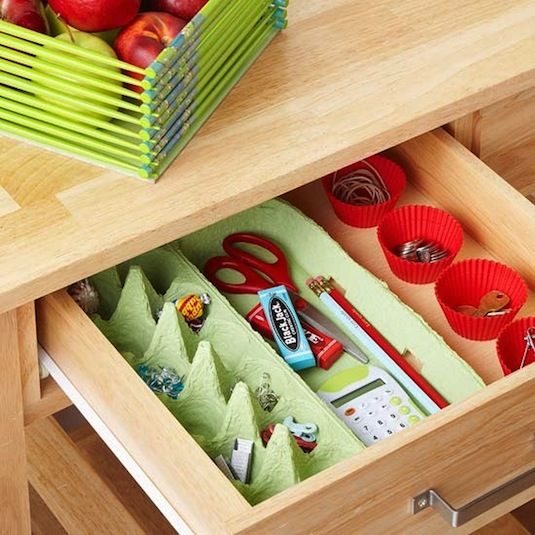
Image courtesy of Listotic.
Given the frequency with which items in a moving RV can get jumbled, employing some sort of containment for all your odds and ends is a must. However, rather than spending money on plastic drawer dividers, save your cash by upcycling! If you have an old egg carton or two around, you’re only 10 minutes from a simple solution.
Just break the egg carton into halves or quarters and place the pieces into a drawer. Now you not only have a long divider for kitchen utensils like prongs and cake knives, but a smaller divider or two with mini-compartments for rubber bands, tacks, and paperclips.
13. Redesign cupboard space with tension rods (1-2 Hours) (source)/ (source)
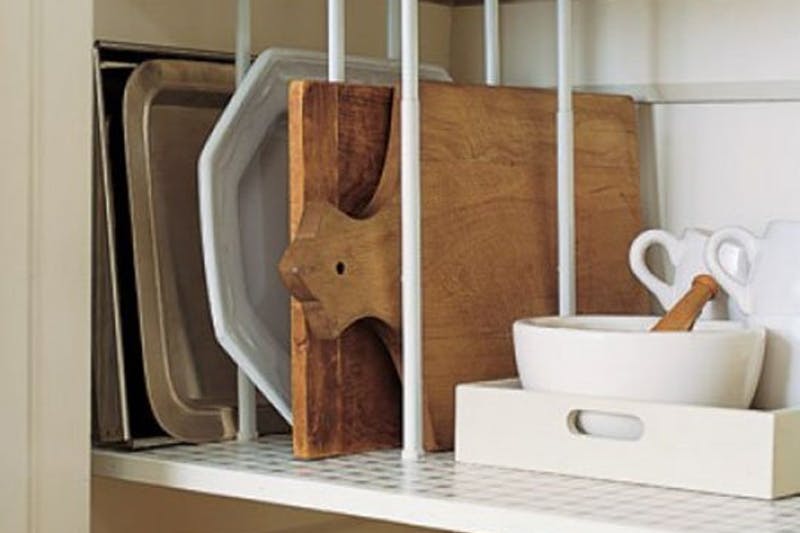
Image courtesy of Martha Stewart.
Whether you’ve got two shelves or three, there isn’t much you can do with cabinet space outside of piling upwards. However, utilizing two to three tension rods can transform even the most basic cupboard into a sophisticated storage unit – no construction involved!
Simply take two smaller tension rods, like those used to hang curtains, and install them vertically between shelves. Try to keep the rods evenly placed and aligned in rows, the width between them is up to you!
Once installed, try placing large plates, cutting boards, or serving trays between the new vertical slats. Now you won’t have to dig them out from beneath a large pile the next time you need them!
14. Build your own tablet station with command hooks (10-15 Minutes) (source)
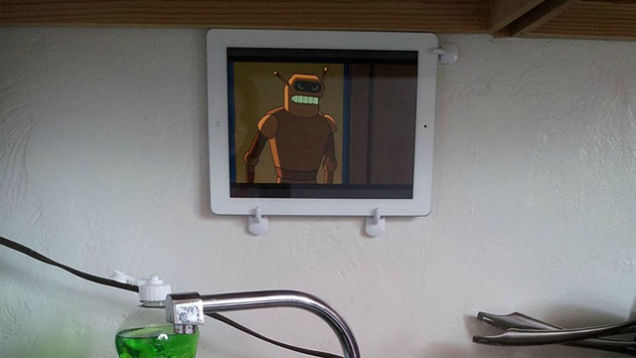
Image courtesy of Life Hacker.
Command hooks are your best friend in limited spaces. Not only do they adhere easily to walls with little mess, but you can place them in a multitude of configurations – like that of your tablet.
This makes mounting your iPad or tablet to the wall a cinch. Simply measure out the height and width of your tablet. You can even do this directly against the wall where you want to place it – just be sure to leave a little extra room (about a half inch or so) between the tablet and your marks. Then place 3-4 command hooks on the wall where you’ve indicated.
Once they’ve set you should be able to easily slide your tablet through!
15. De-clutter fridge space with binder clips and clothespins (10-15 Minutes) (source)

Image courtesy of Good Housekeeping.
Make use of the free vertical space in your fridge by clipping bags of food like lettuce or cheese to individual wires on your shelves. You should only need one binder clip or clothes pin per item, and you can even hang multiple bags from one rung!
Get Cracking
Granted, not every trick on the list might work for you, but try a few standouts and let us know how they turn out.
Or, if you’ve got an RV storage hack of your own, feel free to share!

