


As winter’s cold grip draws near, mobile homeowners face the annual challenge of preparing their homes for the chilly months ahead. While winterizing your mobile home may be far down on your list of priorities, it’s never too early to start. Among the many considerations for winterizing your mobile home, heat tape is one crucial tool in your arsenal.
Even if you have skirting or foundation blocks, the space between the ground and the bottom of your mobile home is not insulated, leaving your pipes vulnerable to the cold. If you live in a northern area, installing mobile home heat tape is an important step you should take before the temperatures drop.
In this article, we will explore what mobile home heat tape is, how it works, when to use it, and how to install it.
What Is Mobile Home Heat Tape?
Mobile home heat tape, or heat cable, is a specialized electrical device designed to prevent water pipes and plumbing from freezing in cold weather. It consists of a cord or cable with electrical heating elements that produce heat when plugged into a power source. Its primary purpose is to maintain a consistent and above-freezing temperature in your water pipes, preventing them from bursting due to freezing.
How Does Mobile Home Heat Tape Work?
To prevent freezing and potential damage to pipes and other sensitive areas, mobile home heat tape uses electricity to keep pipes and other sensitive areas warm, thus preventing freezing and potential damage.
Typically, it has a heating element encased in an insulated cord with a plug at one end for power connection. Usually, it’s linked to a GFCI (ground-fault circuit interrupter) outlet through an extension cord. However, it can sometimes be connected to its own dedicated breaker with the help of an electrician. Once you plug it in, the heat tape warms up, raising the temperature of the surface it’s in contact with and the surrounding area.
Mobile home heat tape can be controlled by a thermostat, ensuring it only works when the temperature drops to a specific point. Most heat cable sold today is self-regulating, meaning they automatically turn on and off based on the thermostat’s reading. For instance, when the temperature drops it produces heat. This helps to conserve energy and ensures it works efficiently. By keeping your pipes and other vulnerable spots above freezing, heat tape protects your home from expensive repairs caused by frozen pipes, like bursts and leaks.
When Should I Use It?
Heat tape becomes crucial when you need to protect your mobile home’s water supply from freezing. It should be used when the risk of frozen pipes is high.
Here are some scenarios where it can be beneficial:
- Winterizing Your Mobile Home: When preparing your mobile home for the winter, installing heat tape on exposed pipes and vulnerable areas is a good idea. This helps to keep the water flowing even during the coldest months.
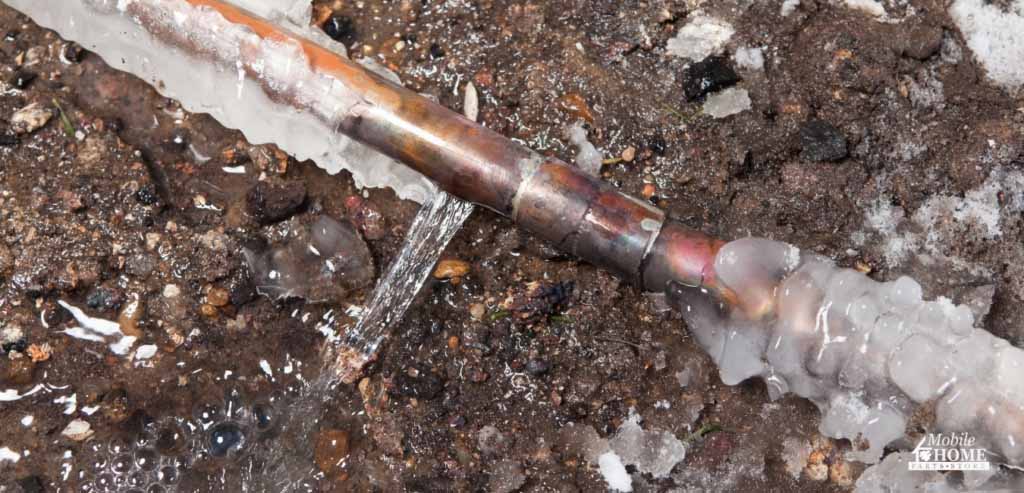
- When Temperatures Start to Freeze: If you live in an area with harsh winters, it’s advisable to use it as soon as the temperatures drop significantly. Don’t wait until the water lines are frozen, as prevention is often more effective than trying to thaw frozen pipes.
How Do I Install Mobile Home Heat Tape?
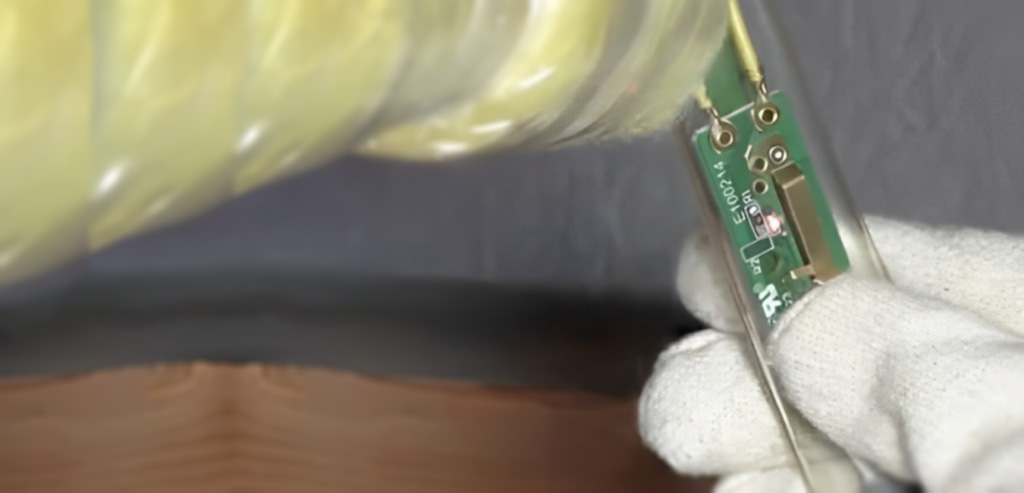 Photo courtesy of Adkins, C., [Mobile Home Living]. (2019, December). Testing a heat tape thermostat. Licensed under Mobile Home Living
Installing heat tape is a relatively straightforward process, but it does require some precautions and steps. It’s essential to follow the manufacturer’s instructions carefully.
Here’s a general guide on how to install:
Materials and Equipment
- The heat tape
- Tape measure
- Power supply/plug kit (contains internal thermostat)
- Electrical tape
- Fiberglass insulation (to keep the heat tape dry once secured)
- Vapor seal wrap (plastic moisture barrier to keep the insulation dry)
- Scissors or knife
- Mask, gloves, and eye protection
Installing Guide
- Measure the Length: First, determine the length you’ll need to cover the pipes or areas you want to protect.
- Clean and Insulate: Clean the pipes and the surrounding area to ensure a secure bond. Additionally, consider adding pipe insulation to maximize the effectiveness.
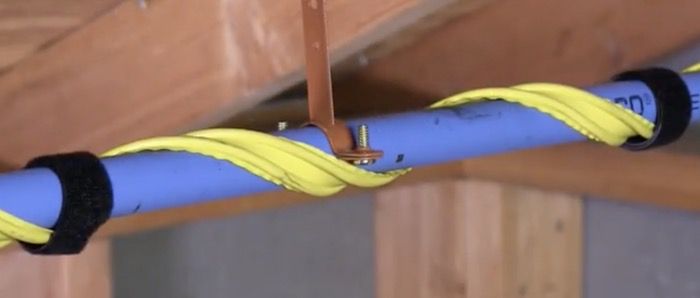
- Wrap the Heat Tape: Starting from the pit where the water supply line emerges from the ground, carefully wrap the heat tape around the pipe every three feet. Make sure to follow the manufacturer’s instructions.
- Secure the Tape: Use Electrical tape at 6″ intervals to secure it in place. Make sure to tie around corners or bends in the pipe for snug contact.
- Add Extra Installation: Use a maximum of 1/2″ fiberglass insulation over the heating cable for lower temperature protection. Apply over cable and thermostat. Protect insulation w/ additional waterproof overwrap.
- Connect to Power: Plug the cord into a GFCI (Ground Fault Circuit Interrupter) 110 outlet to ensure safety. It’s essential to use an outlet designed for outdoor use.
- Test the Heat Tape: Once installed, ensure it works by feeling warmth along the protected pipes. Regularly inspect the tape throughout the winter to ensure it’s functioning correctly.
When Is Mobile Home Heat Tape Not Recommended?
In most cases, mobile home heat tape is a good choice. But there are a few situations where it’s not the best option, and this mainly applies to older mobile homes.
If your mobile home is on the older side and has water lines that were put in before the use of modern materials like PVC and PEX, you need to be careful. The heat tape can get too hot, making those old, thin pipes melt.
Also, there’s a risk of the heat cable coming into contact with aluminum wiring in the electrical system. This could cause an electrical fire, which is very dangerous. So, if your home has aluminum wiring, it’s crucial to replace it as soon as possible if you haven’t already.
On the other hand, if you have a newer mobile home, using a self-regulating heat cable is a no-brainer. If you plan to install it yourself, be sure to follow the instructions from the manufacturer closely. Ideally, you should install this in late September or early October to prepare for the colder months. If you do everything right, a good-quality heat tape should work well for at least three years.
Alternatives to Heat Tape
In cases where mobile home heat tape is not recommended or not available, there are alternative methods to protect your water lines from freezing:
- Pipe Insulation: Use Fiberglass insulation with vapor seal wrap to cover exposed pipe or Frost King® Pipe Wrap Insulation Tape. This is a cost-effective way to add an extra layer of protection.
- Running Water: Allowing a small, continuous flow of water from a faucet can also prevent pipes from freezing. However, this may not be the most water-efficient solution.
- Keep Cabinets Open: In extremely cold weather, leaving cabinet doors under sinks open can allow warm air to circulate around the pipes.
Stay Warm with Mobile Home Parts Store

Mobile home heat tape is an essential tool for protecting your water supply during the winter months. By understanding what it is, how it works, and when to use it, you can effectively winterize your mobile home and prevent frozen pipes. However, it’s essential to install it correctly and consider alternatives when it’s not the most suitable option for your specific situation.
Winterizing your mobile home can seem like a daunting task, but with the right knowledge and tools, you can ensure a warm and comfortable winter season. If you want to get a headstart on this project before fall, Mobile Home Parts Store has the parts and supplies you need to stay warm and cozy all winter long. Check out our wide selection of Freeze Protection, and Tapes & Sealants.
Tags: heat cable, heat tape, mobile home parts, Mobile Home Parts Store, Mobile Home winterizing, Winterize a mobile home

