


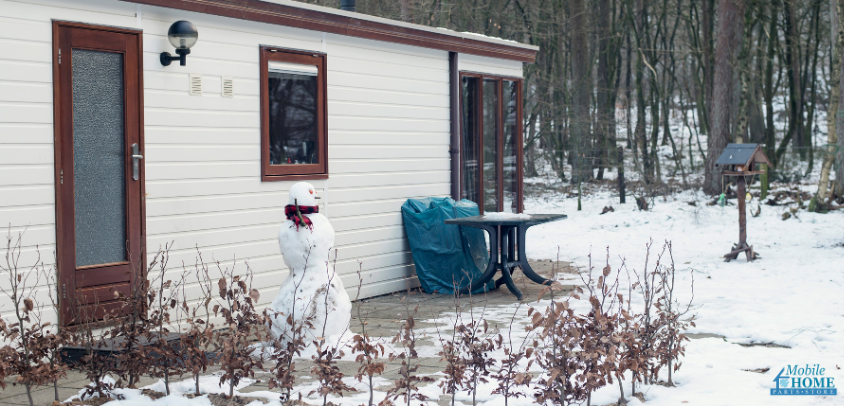
You know how winter works—it sneaks in. One cool sunrise turns into a drafty crawlspace, a cranky furnace, and a pipe under the kitchen sink flirting with frozen.
Older mobile homes weren’t built with today’s insulation standards, and sure—experts will say to add insulation everywhere and swap out doors and windows. Most of us aren’t doing a full overhaul this season. We’re after small, affordable fixes that actually move the needle—weekend-sized wins that keep more heat in, ease the strain on your furnace, and help avoid those holiday-timed repair bills.
We’ll start from the ground—where winter causes trouble first—and work our way up. And because you’re winterizing your mobile home with a practical checklist in mind, each step here builds on the last.
Tie-Downs & Ground Movement
Start low. When the ground freezes, it expands upward—a process called ground heave. Even small shifts can twist the frame, crack siding, and make doors or windows stick. If tie-downs are cinched too tight going into winter, the home can’t move with those seasonal changes—that’s when problems show up.
As part of winterizing your mobile home, back the tie-downs off slightly in late fall—think a small adjustment, about a quarter turn rather than a full spin. After the thaw in spring, tighten them again. While you’re under the home, check the support blocks or jacks: they should be straight, sturdy, and in full contact with the frame. If anything looks tilted or uneven, correct it now. A level home rides out winter far better than one fighting against uneven supports.
A level foundation is only half the battle. Once the home can move naturally with the ground, the next step is protecting your pipes.
Under-Home and Pipe Freeze Protection
Frozen lines tend to fail at the worst moments. Prevention is straightforward.
While you’re winterizing your mobile home underneath the frame, wrap exposed water lines with heat tape. Install it snugly without overlapping, and plug it into a suitable outlet according to the manufacturer’s instructions. Replace any tape that looks cracked, worn, or dated.
Check the insulation under the floor. Look for sags, tears, or damp areas, and re-secure insulation so it sits tight against the subfloor. Close any interior shut-off valves that supply outdoor spigots, then add foam faucet covers.
Before you leave the crawlspace, confirm that downspouts discharge away from the skirting so water doesn’t pool under the home. Keeping the area dry reduces the risk of mold, rot, and long-term damage.
With plumbing safeguarded, turn to what surrounds its base.
Skirting: Secure Panels, Vent the Right Amount, Manage Snow
Skirting does more than close off the crawlspace; it helps control drafts and supports steady furnace performance. Start by checking each panel. If a panel moves or rattles, tighten the fasteners, replace anything missing, and reseat panels fully in their tracks to remove gaps.
Skirting plays a quiet role in winterizing your mobile home: it manages air where the furnace breathes. Ventilation is still necessary in winter, especially for homes with furnaces that draw combustion air from the crawlspace. Keep several skirting vents open—four to six works for many layouts—and place them near corners to reduce dead-air pockets. As a general guide, allow roughly one square foot of venting for every 150 square feet of floor area. If manual venting is easy to forget, temperature-controlled foundation vents are a set-and-forget alternative.
After snowfalls, clear a path along the skirting. Snow piled against panels can dent them and block vents. If certain areas feel persistently cold, consider sliding rigid foam board behind the skirting in those locations to reduce heat loss without replacing the skirting itself.
With the perimeter addressed, move up the exterior.
Roof, Siding, and Gutters: Address Small Issues Before They Grow
Think of this as routine maintenance that prevents bigger problems later. On the roof, check for loose fasteners, aging seams, and small pinholes. Reseal joints annually—especially on metal roofs—and inspect vent caps for the furnace and water heater. Apply coatings only on a dry surface so they bond properly. As you continue winterizing your mobile home from the top down, ten minutes of attention here can prevent leaks when temperatures swing.
Walk the siding next. Tighten any screws that have backed out and snap lifted laps into place along the bottom rail. Even a thin opening can invite wind into wall cavities.
Finish with drainage. Clean gutters before the first hard freeze so water doesn’t back up under the roof edge. Confirm gutters pitch toward their outlets and that downspouts carry water away from the home. Extensions pointed downhill help keep the soil around the supports firm during melt cycles.
With the shell in good condition, turn to the smaller gaps that let heat slip away.
Sealing and Draft Control
This is where winterizing your mobile home pays off fast. A caulk gun and a few lengths of weather-stripping can noticeably improve comfort.
Focus on the usual leak points: window and door frames; plumbing and furnace vents; roof-to-wall flashing; dryer vent trim; siding joints; and any cable or antenna penetrations. Add or replace weather-stripping where doors and windows meet their frames, and install a door sweep if you see light at the threshold.
If you want to pinpoint problem spots, use an inexpensive infrared thermometer or temperature gun. Slide it slowly along frames and corners; a sudden drop indicates a leak worth sealing.
Once drafts are under control, improve comfort at the openings where heat commonly escapes.
Doors, Windows, and Practical Comfort Upgrades
You don’t need new units to get better performance. Start at the edges. Run a clean bead of exterior-grade caulk where trim meets siding. Refresh weather-stripping along the jambs and add a door sweep to stop air at the threshold. For a seasonal boost, apply interior window film or use temporary storm inserts to create a pocket of still air that reduces drafts.
Take one last walk around the exterior and catch any siding fasteners you missed earlier. A tight shell makes every other improvement more effective.
Round things out with the system that will carry most of the workload this season.
Furnace and Exhaust System Essentials
Begin with filtration. Replace disposable filters or clean permanent ones. Vacuum dust from the blower housing. Press the belt at mid-span; if it deflects more than about an inch, adjust it. Remove the thermostat cover and gently clear dust so readings stay accurate.
Outside, clear leaves and debris from the exhaust. After storms, make sure snow isn’t blocking the roof vent. Inside the furnace cabinet, the flue should rise straight and fit tightly at the collar, with no wires touching it.
One non-negotiable when you’re winterizing your mobile home: never starve the furnace of combustion air. Because many mobile-home furnaces draw from beneath the home, keep a few skirting vents open through winter. Blocking all vents can restrict airflow and create safety issues. Also, keep the furnace closet free of storage. If the floor is carpeted, replace it with a fire-resistant surface.
With the system tuned, round things out with basic safety steps.
Fire and Supplemental Heat Safety
Give portable space heaters a clear zone of at least three feet and use only the fuel specified by the manufacturer. Turn units off and allow them to cool completely before refueling.
For wood-burning appliances, schedule a chimney inspection and cleaning before steady use. Burn seasoned wood only. Place stoves on a fire-resistant pad and use a proper screen at fireplaces to contain sparks.
Test smoke detectors and replace batteries ahead of the cold stretch. Keep ABC-rated fire extinguishers in the kitchen and near the furnace. Smaller units discharge quickly, so make sure everyone knows where they are and how to use them.
Conclusion: Steady Steps, Better Winters
Most winter preparation doesn’t require a remodel or a large budget. A focused weekend on the essentials—securing skirting, maintaining ventilation, sealing drafts, protecting plumbing, tuning the furnace, and confirming basic safety—goes a long way toward a warmer, safer home. Start early, move steadily, and you’ll avoid the usual problems: frozen pipes, moisture issues, and unnecessary heat loss.
When you’re ready to gather supplies, Mobile Home Parts Store carries mobile-home-specific items such as heat tape, weather-stripping , filters, and insulation supports. If you’re unsure what fits your setup, browse our step-by-step guides or give us a call—we’ll help you choose what works so the job goes smoothly.
Stay warm, stay comfortable, and head into winter with confidence.
Tags: heating and cooling, Mobile Home winterizing, Winterize a mobile home

