


Mobile home repair doesn’t have to be hard. With the right parts, a little knowledge, and good old-fashioned elbow grease, you can do a lot of repairs yourself—which will save you money. But whether you hire a mobile home contractor or decide to get your hands dirty, it’s much easier than you might think to keep your home in tip-top shape.
In this article, we’ll discuss some of the most common mobile home repairs and how you can undertake them. We’ll give you insider tips and tricks, and we’ll help you avoid common pitfalls. If you’re ready to get your home in great shape again, read on!
Click on the chapter that you need:
- Mobile Home Skirting Repair
- Mobile Home Roof Repair
- Mobile Home Door Repair
- Mobile Home Window Repair
- Mobile Home Floor Repair
- Mobile Home Shower Repair
- Mobile Home Furnace Replacement
Mobile Home Skirting Repair

Image courtesy of Patricia Pacheco, winner of the 2016 Mobile Home Makeover Contest.
We often focus on interior repairs, since that’s where we spend the most time. However, you shouldn’t overlook exterior repairs, especially in the skirting department. Mobile home skirting protects the underside of your home from weather, and it keeps out pests who would like to make it their home. It’s pretty important.
Repair, or replace?
If your skirting is only mildly damaged in a few places, you may be able to repair it without replacing it. If you have a few holes in your vinyl skirting, you should absolutely patch them up before winter. Remember, your plumbing runs under your mobile home. If you don’t protect it properly, your pipes could freeze in the winter. Definitely patch those holes!
Vinyl skirting often gets damaged by weed whackers (string trimmers). It just can’t stand up to that spinning string on its own. However, an easy fix is to install some skirt guard along the bottom of your vinyl skirting. This guard is designed to stand up to weed whackers and other hazards that damage vinyl skirting.
If your vinyl skirting is really in bad shape, you can always replace it with something stronger. Vinyl can be a little flimsy—but luckily, it isn’t the only option. Stronger mobile home skirting like Reil Rock and Novik Stone generally won’t blow out in a storm. Even better: they hold up to weed whacking just fine.
How to measure your home for skirting needs
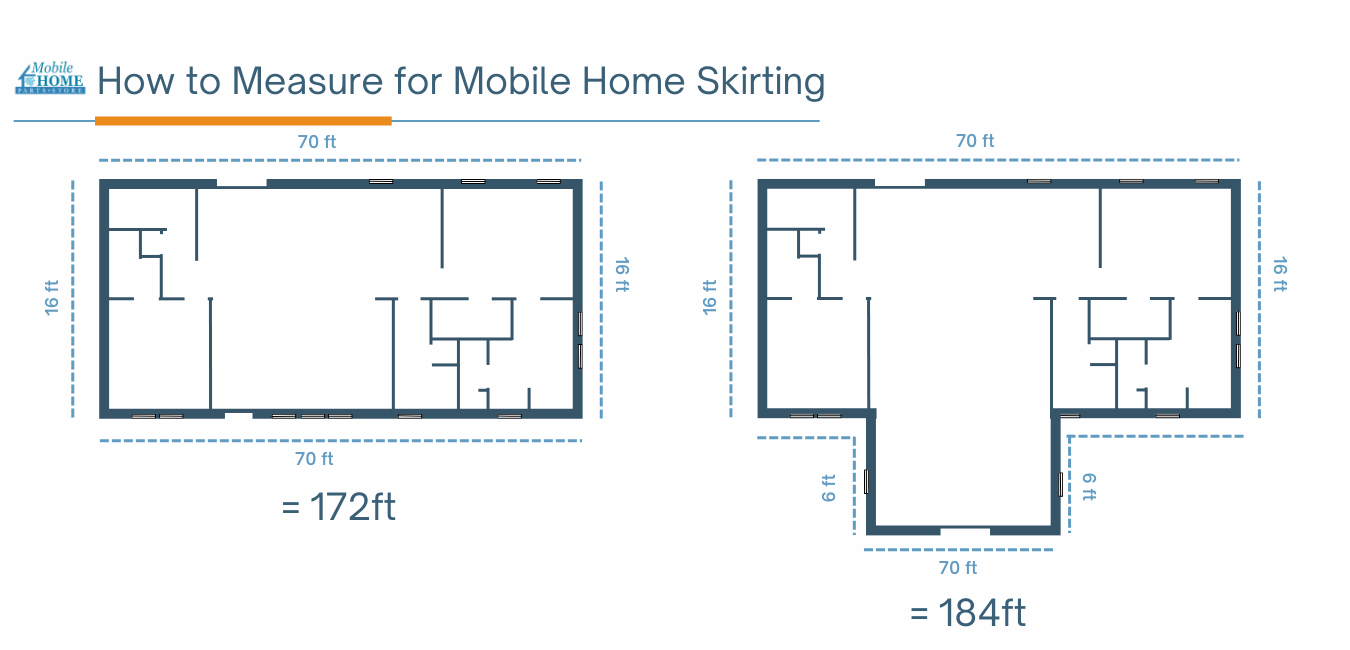
First, you need to measure the linear footage of your home. This is the total length of skirting that you will need to go all the way around your home. If you have a simple rectangular floorplan with no additions or porches, just add up 2x the length of your home and 2x the width of your home. This will cover all the areas that need skirting.
For example, say you have a single wide, 16 feet wide x 70 feet long.
16 + 16 + 70 + 70 = 172ft
You would need 170ft of skirting for this home.
If you have a porch or other addition that also needs skirting, you’ll want to include those figures in your total. But as Crystal Adkins explains over at MobileHomeLiving.org, you only need to include the length and width of the visible sides of your addition.
Say your 16x70ft single-wide has a porch that sticks out an additional 6ft from the main floorplan. You would include the porch depth, 6ft, twice. But you wouldn’t include the width of the porch, since that is already covered in the total length of the home.
16 + 16 + 70 + 70 + 6 + 6 = 184ft
You also need to calculate the average height of your home off the ground. Crystal explains the best way to do this in her post. She says to measure from the ground to 2” above your siding at all four corners. Then do the same thing on both sides at the middle of your home. Now add all the numbers together and divide by 6, and you have your average height.
Leaving ventilation
It’s critical that you leave the underside of your home well-ventilated. Yes, you want skirting to block wind and keep critters out—but you shouldn’t attempt to seal the underside completely. That will lead to mold growth.
If you’re using vinyl skirting, you can purchase a mix of vented panels and solid panels. Note, however, that some building codes may not permit vented panels.
You can also purchase automatic foundation vents that open at 70 degrees F and close at 40 degrees F. This keeps your home foundation ventilated in the summer and protected in the winter.
Installing mobile home skirting
Each type of mobile home skirting has its own unique installation method. Below are instructions for the most common types of skirting.
Installing Novik Skirting (all types)
Mobile Home Roof Repair
You should never wait to repair a mobile home roof. Even the smallest water leak can cause unbelievable damage in a short amount of time. If you have a leak in your roof, find and fix it ASAP!
The water can spread unpredictably. If you find water damage in one place, that doesn’t necessarily mean that the leak is directly overhead. Water could be entering the home in another location, running along a beam or other surface, and finally showing up in the place you found.
Repair, or replace?
The answer to this question will depend on the state of your roof. If you have one small leak, and you’re able to locate it, it’s highly unlikely that you need to replace the whole roof.
If you have multiple small leaks, you can probably address each one with our techniques below. However, if your roof is leaking in many places and showing signs of sagging and deformation, you should consider replacing it.
When in doubt, contact a roofing professional in your area for an expert opinion. Most should provide free estimates.
Rubber roofs: repairs made easy with peel-and-seal tape
For rubber EPDM roofs, peel-and-seal tape is perfect. You can cut it to the exact size and shape you need to get around vents and hatches. Just be sure and put down some Weatherbond primer first. This will help the tape to adhere completely.
Repairing shingle roofs
If you have a missing shingle or two, you can generally make this repair yourself. Simply insert the new shingle under the one above it, aligning it to the pattern all around. Then nail it in place.
If your shingle roof needs a repair more complex than this, it’s best to call in the professionals.
Mobile Home Door Repair
Photo courtesy of Carrie Savage, finalist in the 2016 Mobile Home Makeover Contest.
The exterior door to your mobile home is one of the most important barriers you have against the weather. If it isn’t in tip-top shape, you’ll lose heat in the winter and AC in the summer. That means higher energy bills.
Luckily, repairing or replacing your door is easier than you might think.
Signs that you need to repair your door
It’s fairly easy to tell if your door needs some love. If it doesn’t fit into the door jamb like it used to, then something has probably shifted. Often this means the hinges are not holding the door at the proper angle anymore. It may be a simple matter of tightening hinge screws that have started to pull away from the wall or the door itself. Alternately, you may need to replace your hinges.
If you adjust and/or replace your hinges, and the door still doesn’t fit, you may have a more serious problem with your wall shifting. In that case, no amount of door repair is going to help.
If your knob is getting stuck, or if you’re having trouble unlocking and locking your door, try lubricating it first. Usually, a squirt of WD-40 is enough to bring an old lock back to life. If you try that and still encounter problems, it may be time to replace the knob and lock assembly.
Take a look at your weather stripping, too. This gets so much wear, it’s often the first thing to go on a mobile home door. Luckily, it’s easy to replace.
Signs that you should replace your door
Mobile home doors wear out fast. Sometimes, none of the above remedies will help. If the screw holes in your door are stripped, for example, you won’t be able to tighten them to bring the door back up to the proper angle. In that case, there is no alternative but to install a new door.
If your door is bulging or warped, it’s time to replace it. If any of the door’s components or moldings are pulling apart, you should replace it as soon as possible.
If your knob assembly is breaking down and the area that holds the knob in the door is worn out as well, you will need to replace your door.
Getting the right door
NOTE: Mobile home doors are NOT the same size as doors for site-built homes! In other words, that beautiful door at Lowe’s probably won’t fit your doorway without modification.
The simplest thing is to buy a door that’s designed specifically for a mobile home.
How to measure your door
Measure the width of the door from the inside of one jamb to the inside of the other jamb. Do not measure the width of the door itself, or the width of the frame.
Measure the height of the door from the inside of the top jamb to the floor.
Select the nearest size. E.g., for a rough opening that measures 33 ½” wide and 75 ½” tall, you would select a 34”x76” door.
Installing your new door
For most mobile home doors, installation will be similar to the instructions here. However, you should follow the installation instructions that come with your door.
For almost all installations, you will need a roll of putty tape to create the seal around your new door. If your door is not pre-drilled for a deadbolt, you will need to create that hole.
Mobile Home Window Repair
Problems with mobile home windows generally fall into two categories:
- 1. Broken glass
- 2. Window frame problems
If you have broken glass, you can choose to replace the glass, or you can replace the whole window. (More on that below.) If you have a problem with the window frame, you will need to replace the whole window.
Window pane replacement
If you have one broken pane in your window, it may be cheaper to replace the glass only. However, note that this is far more difficult than replacing the entire window—and it will only be cheaper if you have the skills to do this yourself. If you do, you know what you’re doing. If not, you should replace the entire window unit.
Window frame replacement
First off, you need to measure your existing window. The video below explains how. If the video doesn’t work, see step 3 below.
Mobile home window replacement is a fairly simple job. Exact instructions will depend on the window you purchase. However, the video below gives a general view of the procedure.
Basic procedure for replacing a mobile home window:
- Remove the old window. Unscrew the screws and pull out the window frame.
- Remove any old caulking that did not come with the old frame.
- Measure the width and height of the resulting hole in the wall. Do NOT measure the old window frame.
- Your new window should be ¼” greater in height and width than the part of the window that fits into the hole.
- Note: if the existing window hole is not square to the floor, or if it is more than 1/8” out of square, the new window will not fit properly. You will have to address this problem before replacing the window.
- On the exterior of the home, check the fit of the window. Make sure there are no gaps between the outer flange of the window frame and the material that it will contact once installed. Make sure the wall is structurally sound and ready to hold a new window.
- If there are gaps, it’s possible the flange was damaged in shipping. If so, try to straighten the mounting flange before installing the window. If there are gaps that are due to defects in the wall of the home, you must address these problems before installing the window. Gaps will allow air and water to enter, which will damage your home.
- Close the new window unit while installing it.
- Apply a ¼” continuous strip of sealant caulk to the backside of the mounting flange. If you’re using a caulk that dries, make sure you get the window installed before the caulk sets up.
- If you need to shim the window to get a square fit, do so ONLY on the underside. Never place shims on top of the window. Doing so will place building loads on the window, which could cause it to fail. Place shims beneath the extreme corners of the window as necessary. Also place shims every 12” on center to support the weight of the window. Failure to follow this shim technique will cause the window to warp.
- With the window held firmly against the exterior wall, begin installing the screws that will hold it in place. Start with a screw hole in the center of one of the sides. Then put a screw in the center of the opposite side, then the center of the head, then the center of the sill. This is like installing a wheel on a car; you want to distribute the pressure evenly so the window doesn’t get deformed.
- After gently screwing down the center of each side of the window, check to make sure it opens and closes freely. If not, remove the window, adjust the shims as necessary, and try again. If it operates freely and all sides read as square, proceed to install the remainder of the screws. Move out from the center to the corners on each side. Do NOT over-tighten the screws, or you will deform the window.
Mobile Home Floor Repair
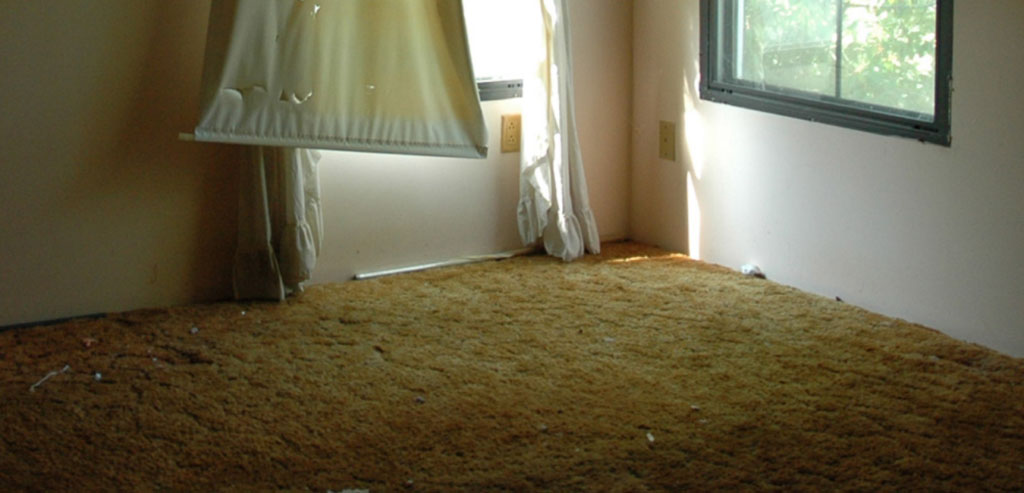
Photo courtesy of Carrie Savage, finalist in the 2016 Mobile Home Makeover Contest.
Under carpet and other materials, many older mobile homes have the cheapest flooring imaginable: particle board. This stuff is easily damaged by moisture. Once it gets wet, it will retain that water, and the water spreads easily throughout it.
Life happens. Sometimes a pipe breaks under the sink, or the family dog upsets his water bowl while no one is home. Unfortunately, small incidents like this can cause crippling damage to mobile home flooring.
Luckily, replacing your flooring is easier than you might think. You can lay new plywood over the damaged particle board, then put down the tile or carpet of your choice. As DoItYourself.com suggests, you can even reuse your carpet if you want—just be careful when pulling it up. It’s easy to rip. As that same article suggests, you should use 0.75” plywood rated for outdoor use.
NOTE: placing plywood over your existing low-quality flooring will raise the overall height of your floor. This should not be an issue, generally speaking. If you’re concerned, you can cover your new flooring with linoleum, which will create a thinner overall impression than carpet.
If you decide to cut out the damaged patches and fill them with plywood, take note: you MUST ensure you don’t cut the underlying joists when cutting out the damaged flooring. This could impair your home’s structural integrity.
Also, check adjoining rooms for flooring damage. Often, moisture will spread through the flooring, even under walls. If you have moisture-damaged flooring between rooms, under a wall that is not supported by a joist, note that you CANNOT remove this flooring! As the Mobile Home Doctor explains, doing so will impair your home’s structural integrity.
Mobile Home Shower and Tub Repair
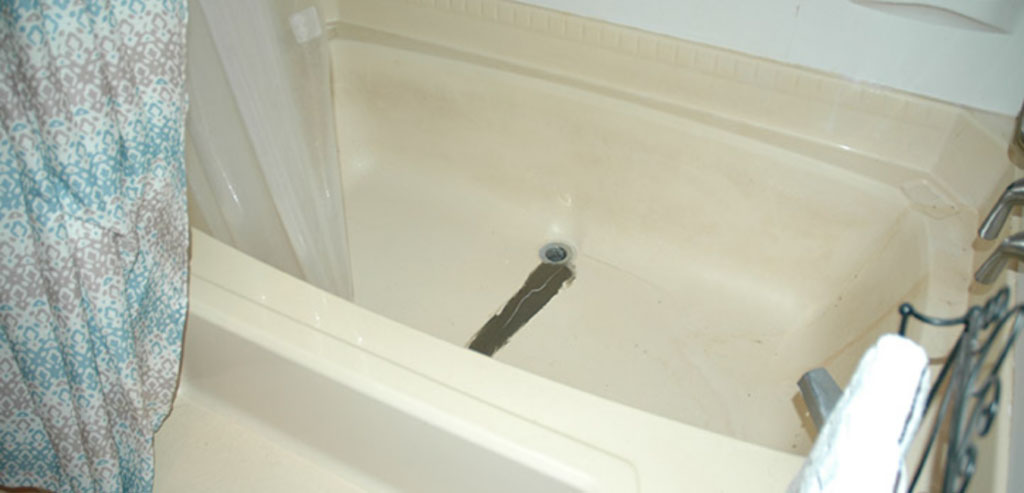
Photo courtesy of Carrie Savage, finalist in the 2016 Mobile Home Makeover Contest.
If you have any kind of leak in your shower, tub, or associated plumbing, it’s essential to repair it as soon as possible. Leaks travel fast in walls and floors. Even a few days of leakage can cause serious damage to your home.
Luckily, mobile home shower repair is easier than you might think. You can do many repairs yourself.
Repairing a cracked bathtub or shower pan
A cracked tub or shower pan can cause severe water damage to any wood below or nearby. Remember, leaks travel in unpredictable ways. That means the area directly under the leak might not be the only area that’s affected. It’s crucial to repair a cracked tub or shower pan right away.
A bathroom repair epoxy kit is a quick and easy way to take care of cracks. The epoxy works on plastic, fiberglass, and ceramic and dries completely sealed and waterproof. It sets up in 20 minutes, and you can use it on cracks that are less than 5” long. For larger repairs, you can get multiple kits.
Replacing a bathtub faucet
You can usually replace your bathtub faucet yourself, though be advised, you may take the fixture off and find damage which you didn’t know existed. That said, here are the basics of replacing your mobile home bathtub faucet:
- Shut off the water.
- Take off the old faucet. Loosen nuts by hand or use pliers if they’re too tight.
- Clean the area behind the old faucet if necessary.
- Put plumber’s putty around the inside edge of the new faucet.
- Mount the new faucet on the wall. Check for alignment before tightening the nuts.
- Hook up the water to the new faucet. Use fittings as necessary.
- Turn the water on and run your new faucet for a while. Watch for leaks.
Replacing a bathtub or shower pan
Eventually, your bathtub or shower pan will give up the ghost. It could be cracked beyond repair, deformed and leaking at the caulking, or so filthy that you just can’t clean it anymore. All of these problems are signs that it’s time for a new tub or pan.
Generally, it’s best to leave this kind of repair to a professional. Purchase the tub that will look best in your bathroom and hire a contractor to install it.
Mobile Home Furnace Replacement
What size of furnace do you need?
First things first: you CANNOT replace your mobile home gas furnace with a furnace for a site-built home. Doing so can put you and your family at risk of carbon monoxide poisoning. The two furnace types work very differently and require different venting and duct systems. You need a furnace that is designed for a mobile home or manufactured home.
Your existing mobile home furnace may or may not be powerful enough to heat your home. The furnace power you need depends on two factors: your home’s square footage, and the climate where you live.
In warm climates, you can generally estimate that you’ll need 25-35 BTUs per square foot. In cold climates, you should estimate 45-60 BTUs per square foot.
Multiply these figures by your home’s square footage. That will give you the minimum BTU rating which your new furnace should have. If you choose a furnace below this minimum, your new unit will not heat your home effectively. It will have to run all the time, which will cost you far more in the long run than buying the furnace you really need.

Also take note of whether you have a gas furnace or an electrical furnace. Though you can switch from one to the other, it’s far less work (and much cheaper) to replace your furnace with a new one that uses the same power source. Then you don’t have to run new electrical lines or new gas lines.
Replacing a gas furnace in your mobile home
Unfortunately, unless you are a licensed gas technician, you can’t replace a gas furnace yourself. However, you CAN get the right gas furnace for your mobile home, and you can do some research as well as prepare the area for your contractor to work in.
Look up HVAC technicians in your area who specialize in mobile homes. Remember, mobile home furnaces are completely different from site-built furnaces. They’re smaller, they’re designed to sit safely up against walls, and they connect to smaller ducts. So make sure your contractor specializes in mobile home heating.
It’s a good idea to get several estimates. However, don’t base your final choice on price alone. If you can, try to get a sense of the contractor’s reputation and quality of work. If the contractor has a website, you can look at their Google reviews. If you have a friend who recently replaced their furnace, ask who they used and how it went.
Bottom line, you want to take the contractor who offers a good price—as long as he or she is reputable and trustworthy.
Prepare your home for your contractor by doing the obvious. Create a clean path of entry from the door to the furnace room. Remove anything that might stand in the way of the work. If you have pets or children, make appropriate arrangements to keep them away from the work zone.
It helps to be hospitable. You can always offer your contractor a snack or something to drink. Good will goes a long way, and it’s the right thing to do.
Replacing an electric furnace in your mobile home
If you have an electric furnace that needs to be replaced, you’re in luck: you can do this repair yourself. If you don’t want to bother with all the technical details, you can also hire a contractor.
The first step is to select the right electric furnace for your mobile home. There are two popular options in the realm of mobile home electric heating: Nordyne electric furnaces and Coleman/Revolv electric furnaces. Use the method in the diagram above to calculate how many BTUs you need to heat your home.
After you’ve selected the right furnace, it’s time to prepare your home.
Take a look at your existing furnace. You may need to replace some or all of the hoses connected to it. You may also need a new return grill assembly, duct connector, or thermostat.
First, turn off the electricity at the furnace itself. Then turn off the electricity for your entire home. This is a double safety measure. As a triple check, use a voltmeter to make sure that the voltage really is turned off.
Disconnect the electric cords and the circulation hoses from the furnace. Remove the old furnace and put the new one in its place. Reattach the electric connections and the tubing. If the furnace is intended to be screwed to the wall, install those screws at this time. Turn the electricity back on only after everything else is finished.
As a last step, test your furnace. Turn it on and allow it to run for a while. Check to make sure that it is producing heat as it should.
The Bottom Line
Mobile home repair is easier than you might think. With a little knowledge, a little elbow grease, and the right parts, you can keep your home in tiptop shape for years to come. There’s a certain satisfaction that comes with doing things yourself. Now get out there and tackle that repair that you’ve been dreading. Here’s to the DIY spirit!

